In this article, I'm going to show you how I've automated a small part of my client's project's QA using GitHub Actions.
A brief introduction
Actions are a recent feature added by GitHub to improve your project management or workflow by automatically running code snippets on plenty of different triggers. And when I say plenty, trust me, almost everything you can do on GitHub has a dedicated hook for actions. Here's a list of all the supported actions.
How an Action works
Let's start by saying that an Action is a simple code snippet hosted and executed on a GitHub infrastructure. Every action must run into a Workflow, which contains and runs Actions, giving them a well-defined purpose. Technically every Action is a Docker container, that means you can use any language you like, and not all Actions must use the same programming language. This is a huge advantage in terms of community freedom; the drawback for this technology is that performance is not a thing. In fact, there are some limitations on hard disk space, execution time, log size, and the number of actions you can run into a workflow.
My idea
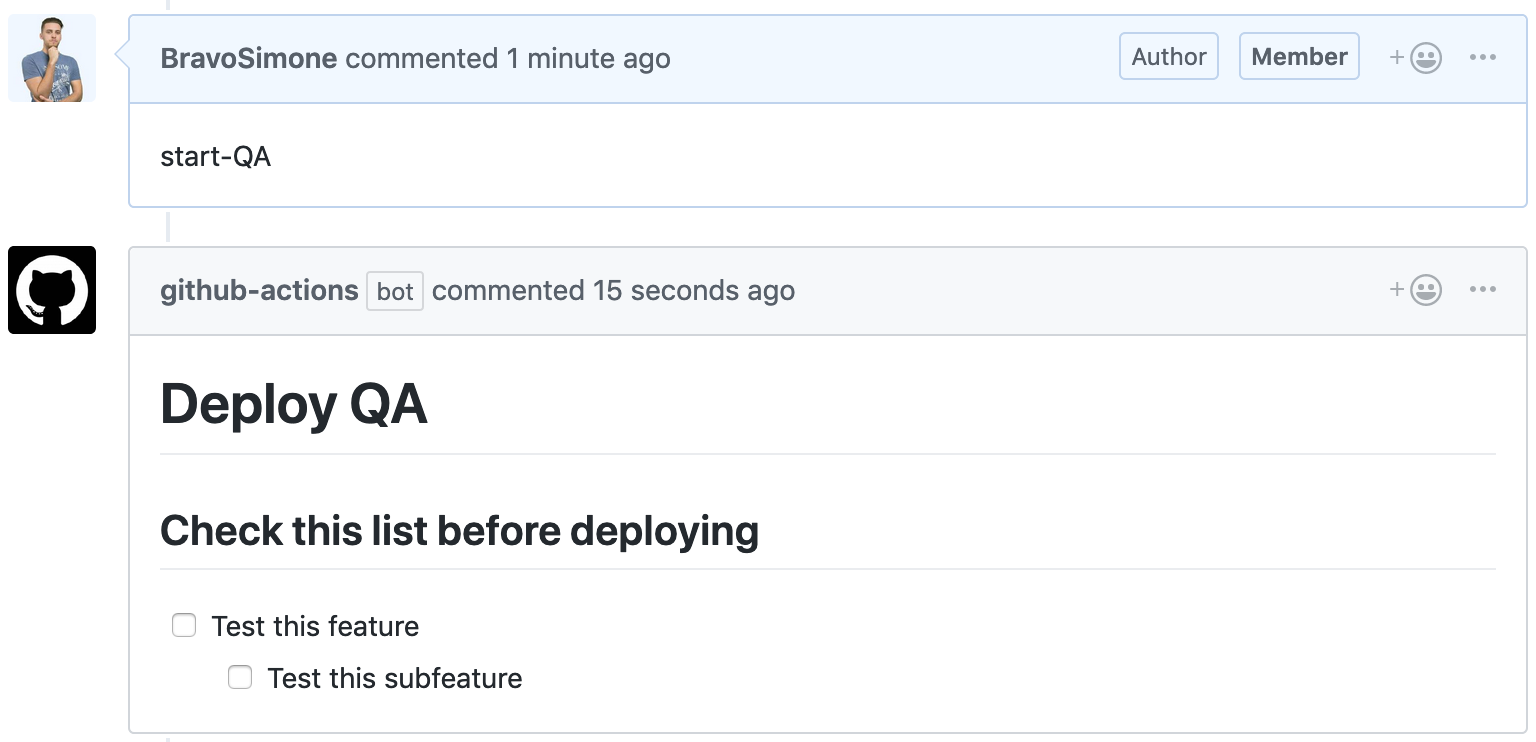
While working on my client, I noticed that we needed an accurate QA list to accomplish before merging or deploying new features. As a programmer, I know how lazy a programmer can be 😄, so I decided to automate the "Copy and paste" step and limit the human interaction to a simple "start-QA" comment in the issue which needs the QA. At this point a simple "bot" will add a comment containing the list of tasks to fulfill the QA.
Let's just jump into it
My first Workflow
First of all, let's see what a workflow looks like:
At the beginning, the GUI provided by GitHub is really helpful to get an idea on how to properly arrange actions having a good starting point to work with. Now let's see how a programmer sees a workflow:
# .github/main.workflow
workflow "QA" {
  resolves = ["Add QA comment"]
  on = "issue_comment"
}
action "Is QA comment?" {
  uses = "actions/bin/filter@c6471707d308175c57dfe91963406ef205837dbd"
  args = "issue_comment start-QA"
}
action "Add QA comment" {
  uses = "./action-add-qa-message"
  needs = ["Is QA comment?"]
  secrets = ["GITHUB_TOKEN"]
}
As you can see, the key parts are the used actions, they can be both provided by
your own repo or imported from an external repo. The documentation suggests to
always go with the second option as it keeps your project cleaner. Another
important part is the needs variable which is what defines our Actions flow.
After defining the base workflow, you should be good to start defining your
custom Actions.
My first Action
To define an action, first of all, we need to define a Dockerfile, here's my example:
# action-add-qa-message/Dockerfile
FROM ruby:2.6.0-alpine3.8
LABEL "com.github.actions.name"="Add QA message"
LABEL "com.github.actions.description"="Adds a QA checklist to the desired issue"
LABEL "com.github.actions.icon"="check-square"
LABEL "com.github.actions.color"="red"
LABEL "repository"="http://github.com/nebulab/github_actions_sandbox"
LABEL "homepage"="http://github.com/nebulab/github_actions_sandbox"
LABEL "maintainer"="Simoncino <[email protected]>"
CMD ["ruby", "/github/workspace/action-add-qa-message/add_qa_on_issue.rb"]
The Dockerfile is just responsible to define the Action's description and to
run your script. By default, the Dockerfile will run the entrypoint.sh file,
if provided by the project. In this case, I just need to run a Ruby script so
I've used the CMD command.
Now let's see the trickier part: the Ruby script which creates the QA list. Here's the code:
# action-add-qa-message/add_qa_on_issue.rb
# frozen_string_literal: true
require 'net/http'
require 'json'
github_event = JSON.parse(File.read(ENV['GITHUB_EVENT_PATH']))
return unless github_event['action'] == 'created'
body = File.read('/github/workspace/action-add-qa-message/qa_list.md')
github_token = ENV['GITHUB_TOKEN']
api_version = 'v3'
header = {
  'Accept': "application/vnd.github.#{api_version}+json",
  'Authorization': "token #{github_token}"
}
issue_number = github_event['issue']['number']
repo = ENV['GITHUB_REPOSITORY']
uri = URI.parse("https://api.github.com/repos/#{repo}/issues/#{issue_number}/comments")
http = Net::HTTP.new(uri.host, uri.port)
http.use_ssl = true
request = Net::HTTP::Post.new(uri.request_uri, header)
request.body = { body: body }.to_json
http.request(request)
The first interesting line you encounter in the code above is this one:
github_event = JSON.parse(File.read(ENV['GITHUB_EVENT_PATH']))
This variable is set to the path of a JSON file containing all the event related
info you need to exactly know how to interact with it. Another cool detail
added by GitHub is the GITHUB_TOKEN environment variable, in fact, you don't
need to create a personal token to make API calls. All interactions made with
the action's token will not trigger other hooks, so don't worry, you can't
accidentally create a fork bomb 😄. As you can see the QA list is read
directly from repo which GitHub automatically mounts it in /github/workspace.
Remember to add a file named action-add-qa-message/qa_list.md with your custom
QA list. That's it, we got everything and we just need to call the endpoint.
That's all folks
Now every time you will write "Start-QA" on a comment, GitHub Actions will provide you a detailed QA list to follow.

My thoughts
All in all, I think that GitHub Actions can be really helpful in the everyday GitHub work. This is what I loved about them:
- easy to set up once you understood how they work
- you're free to use whatever language you want
- the real limit is your imagination
While the things I didn't like about them are:
- their execution is not immediate because each action must run a Docker image
- the documentation is not straightforward at the beginning if you want to create your custom action (for example I've struggled to find where Docker mounted the project and the supported icons list)
- you can't do anything to overcome limitations (I hope after the beta you will be able to pay faster Docker containers)
- there isn't an easy way to debug them when executed on GitHub and there isn't an official way to run actions locally.
Despite the cons are more than the pros (sometimes I'm a grumpy person) I really like what GitHub came up with. I'm just waiting to see what the GitHub community will be able to create.