
I love coding, and recently I started enjoying some devops too. I always preferred writing code more than configuring Apache, servers and services, so I feel I'm a bit late to the devops and cloud computing party... but better late than never!
This post was born from the idea of mixing together Solidus (the best ecommerce available in Ruby land) and Amazon AWS (probably the most successful and advanced cloud computing platform) using Opsworks, Chef and the gem opworks ruby. I'm going to follow a step by step process with lots of screenshots, hoping this will remain relevant in the next future. Without further ado, let's get started!
Solidus
The first step is generating a Solidus application that can run locally.
Create a new Rails app (use the -D flag and set the RDBMS you want to use with
Amazon RDS, I used MySQL for this demo), add Solidus gems and generate the
Solidus boilerplate as per Solidus README.
After running all commands your development environment should be ready for a ride.
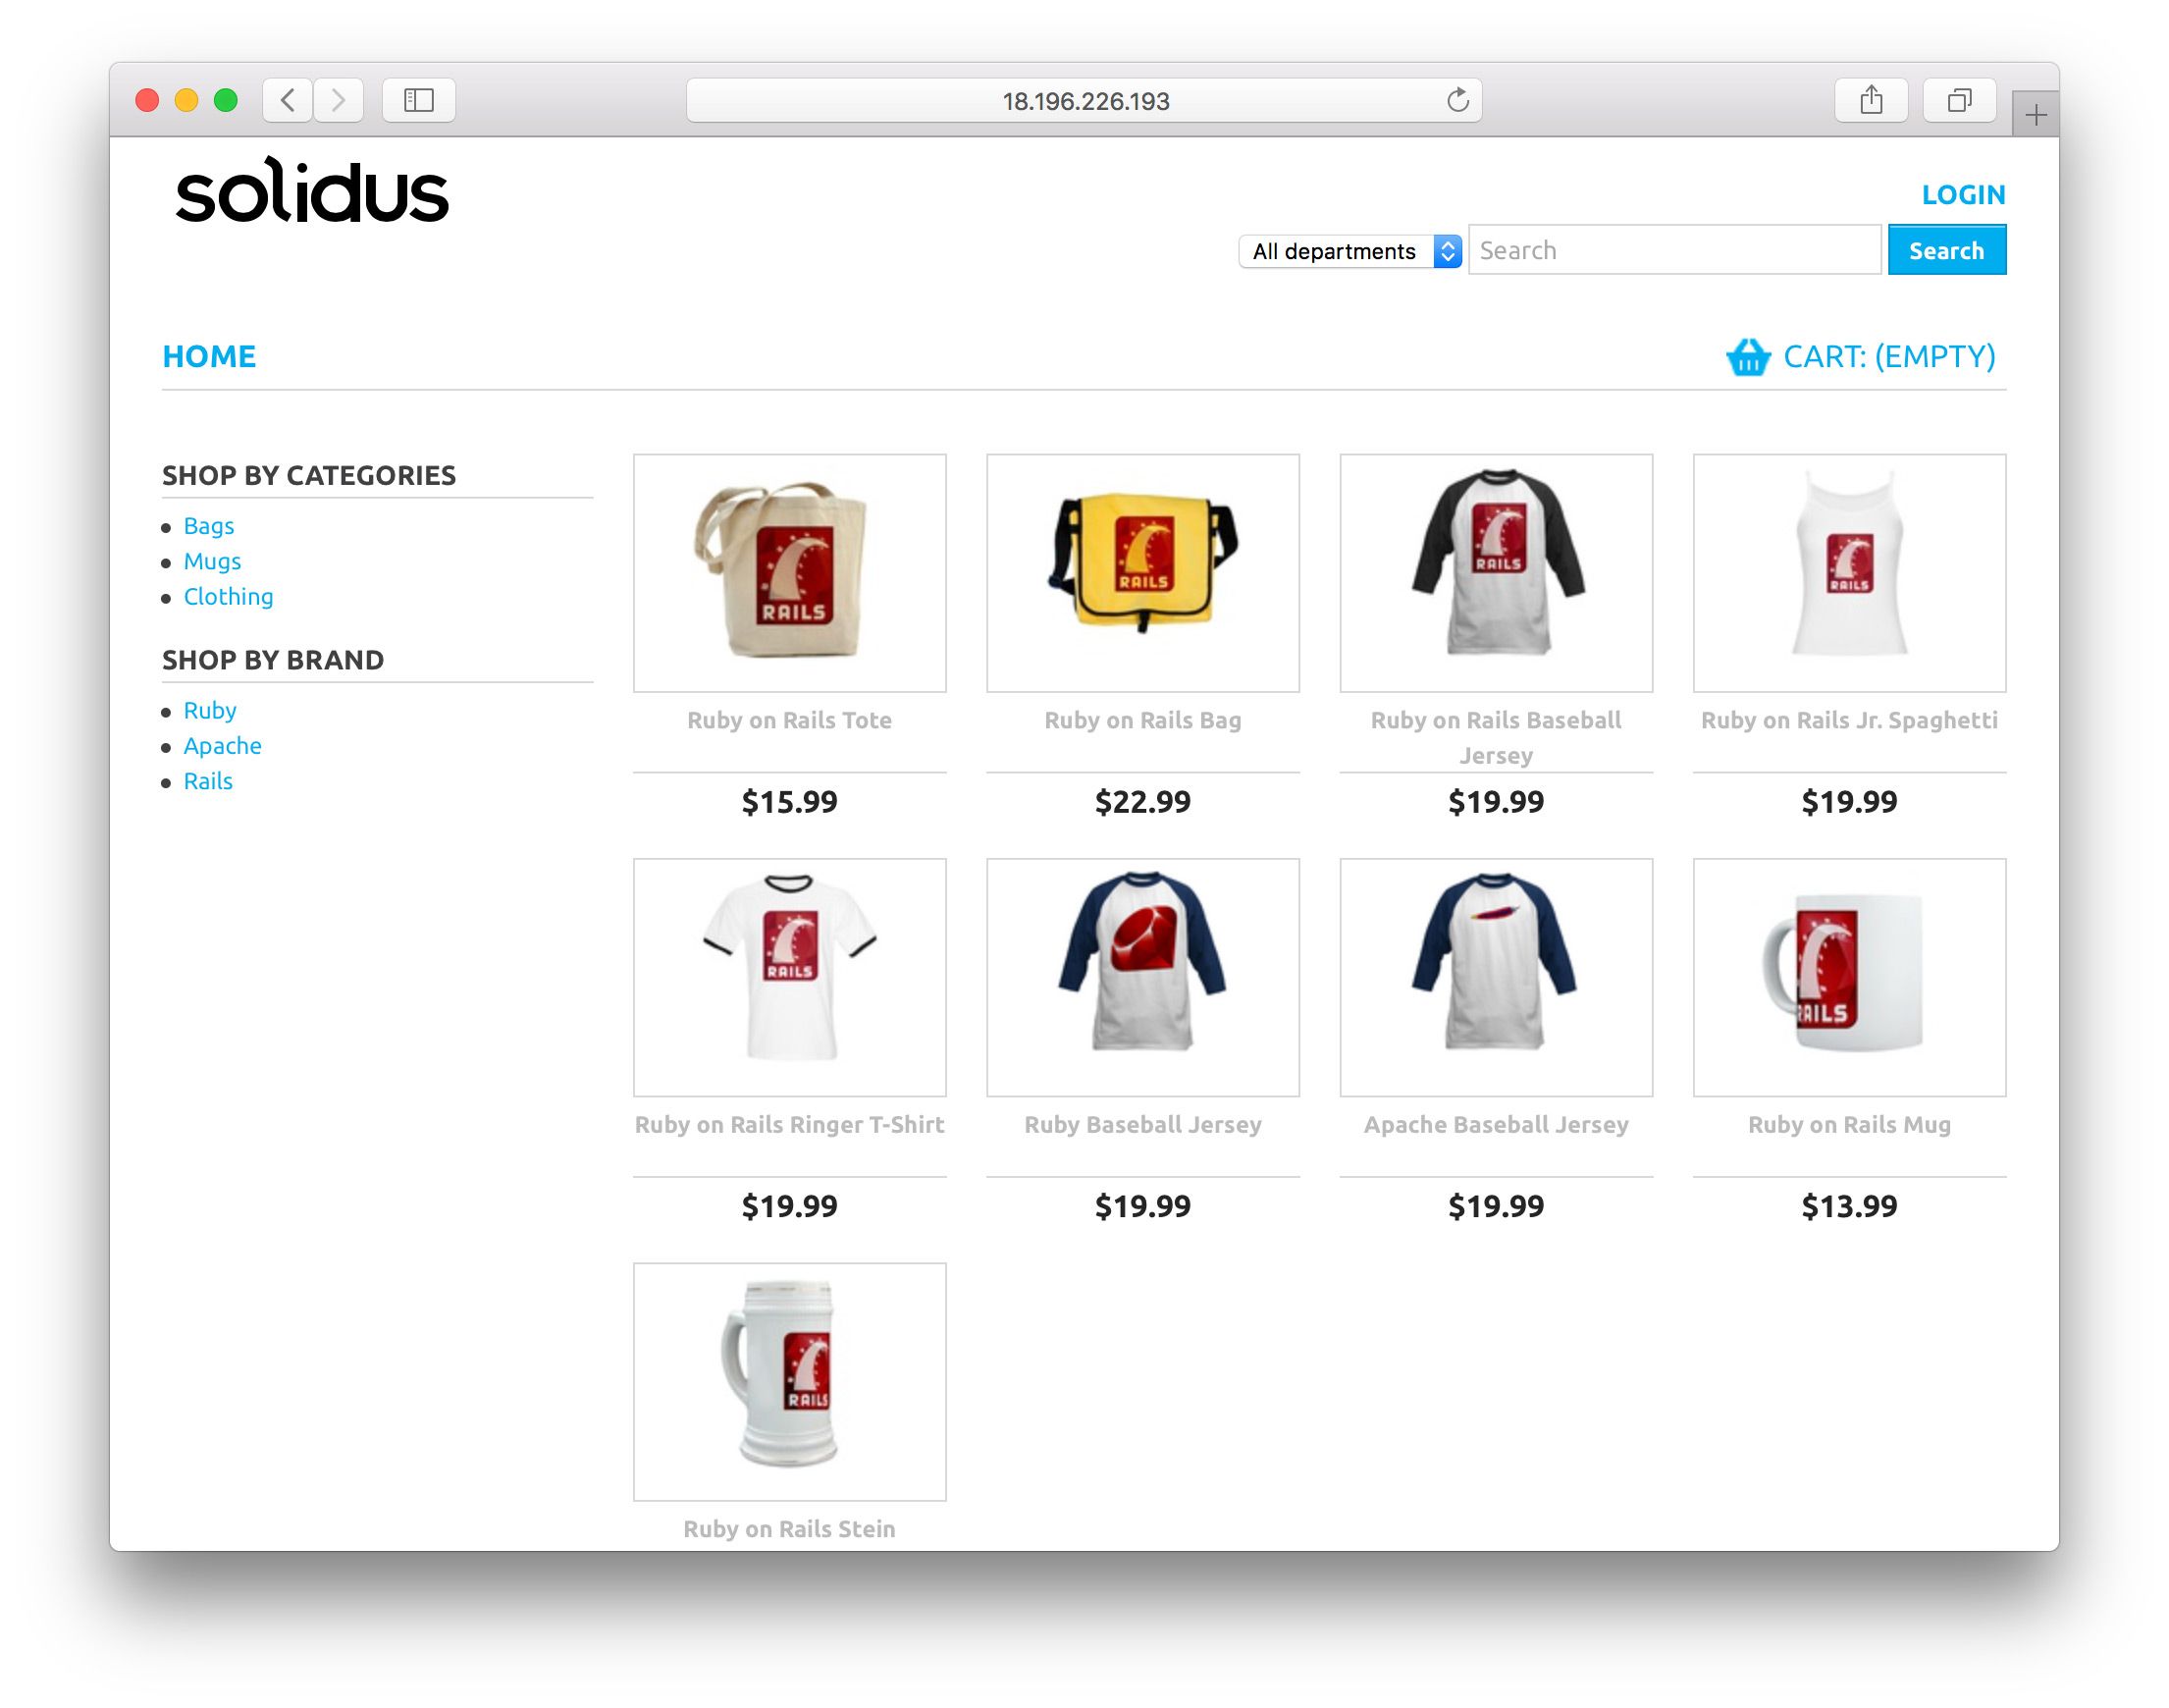
Start the server, navigate to localhost:3000 and you should see your store
homepage with all Rails branded gadgets.
By the end of this post we'll be able see this very same page hosted in the cloud:

Create a new repository on Github and push your code, we're going to need it later... or you can use my repository.
Opsworks ruby
Now it’s time to setup the deployment environment. First, in order to deploy a Rails app with Opsworks you need a proper Chef cookbook. A Chef cookbook is a collection of recipes, written in Ruby, that contain information on resources (programs, services etc.) that need to be installed, changed, and run on a node.
For our needs you can pick the one I wrote (check git history for changes) or you can create a new one following the instructions in the README.
This cookbook is based on opsworks-ruby, a set of Chef recipes that completely
automate the provisioning and deployment to AWS of the most popular Ruby web frameworks
including Rails, Hanami and Padrino.

Once you have the cookbook ready, you need to upload the file opsworks_cookbook.tar.gz
to Amazon S3.
For the sake of simplicity, let’s make the file public - it may be left private as well,
but then you’d need to provide access credentials when you create the app on OpsWorks.
Opsworks AWS
Create the stack
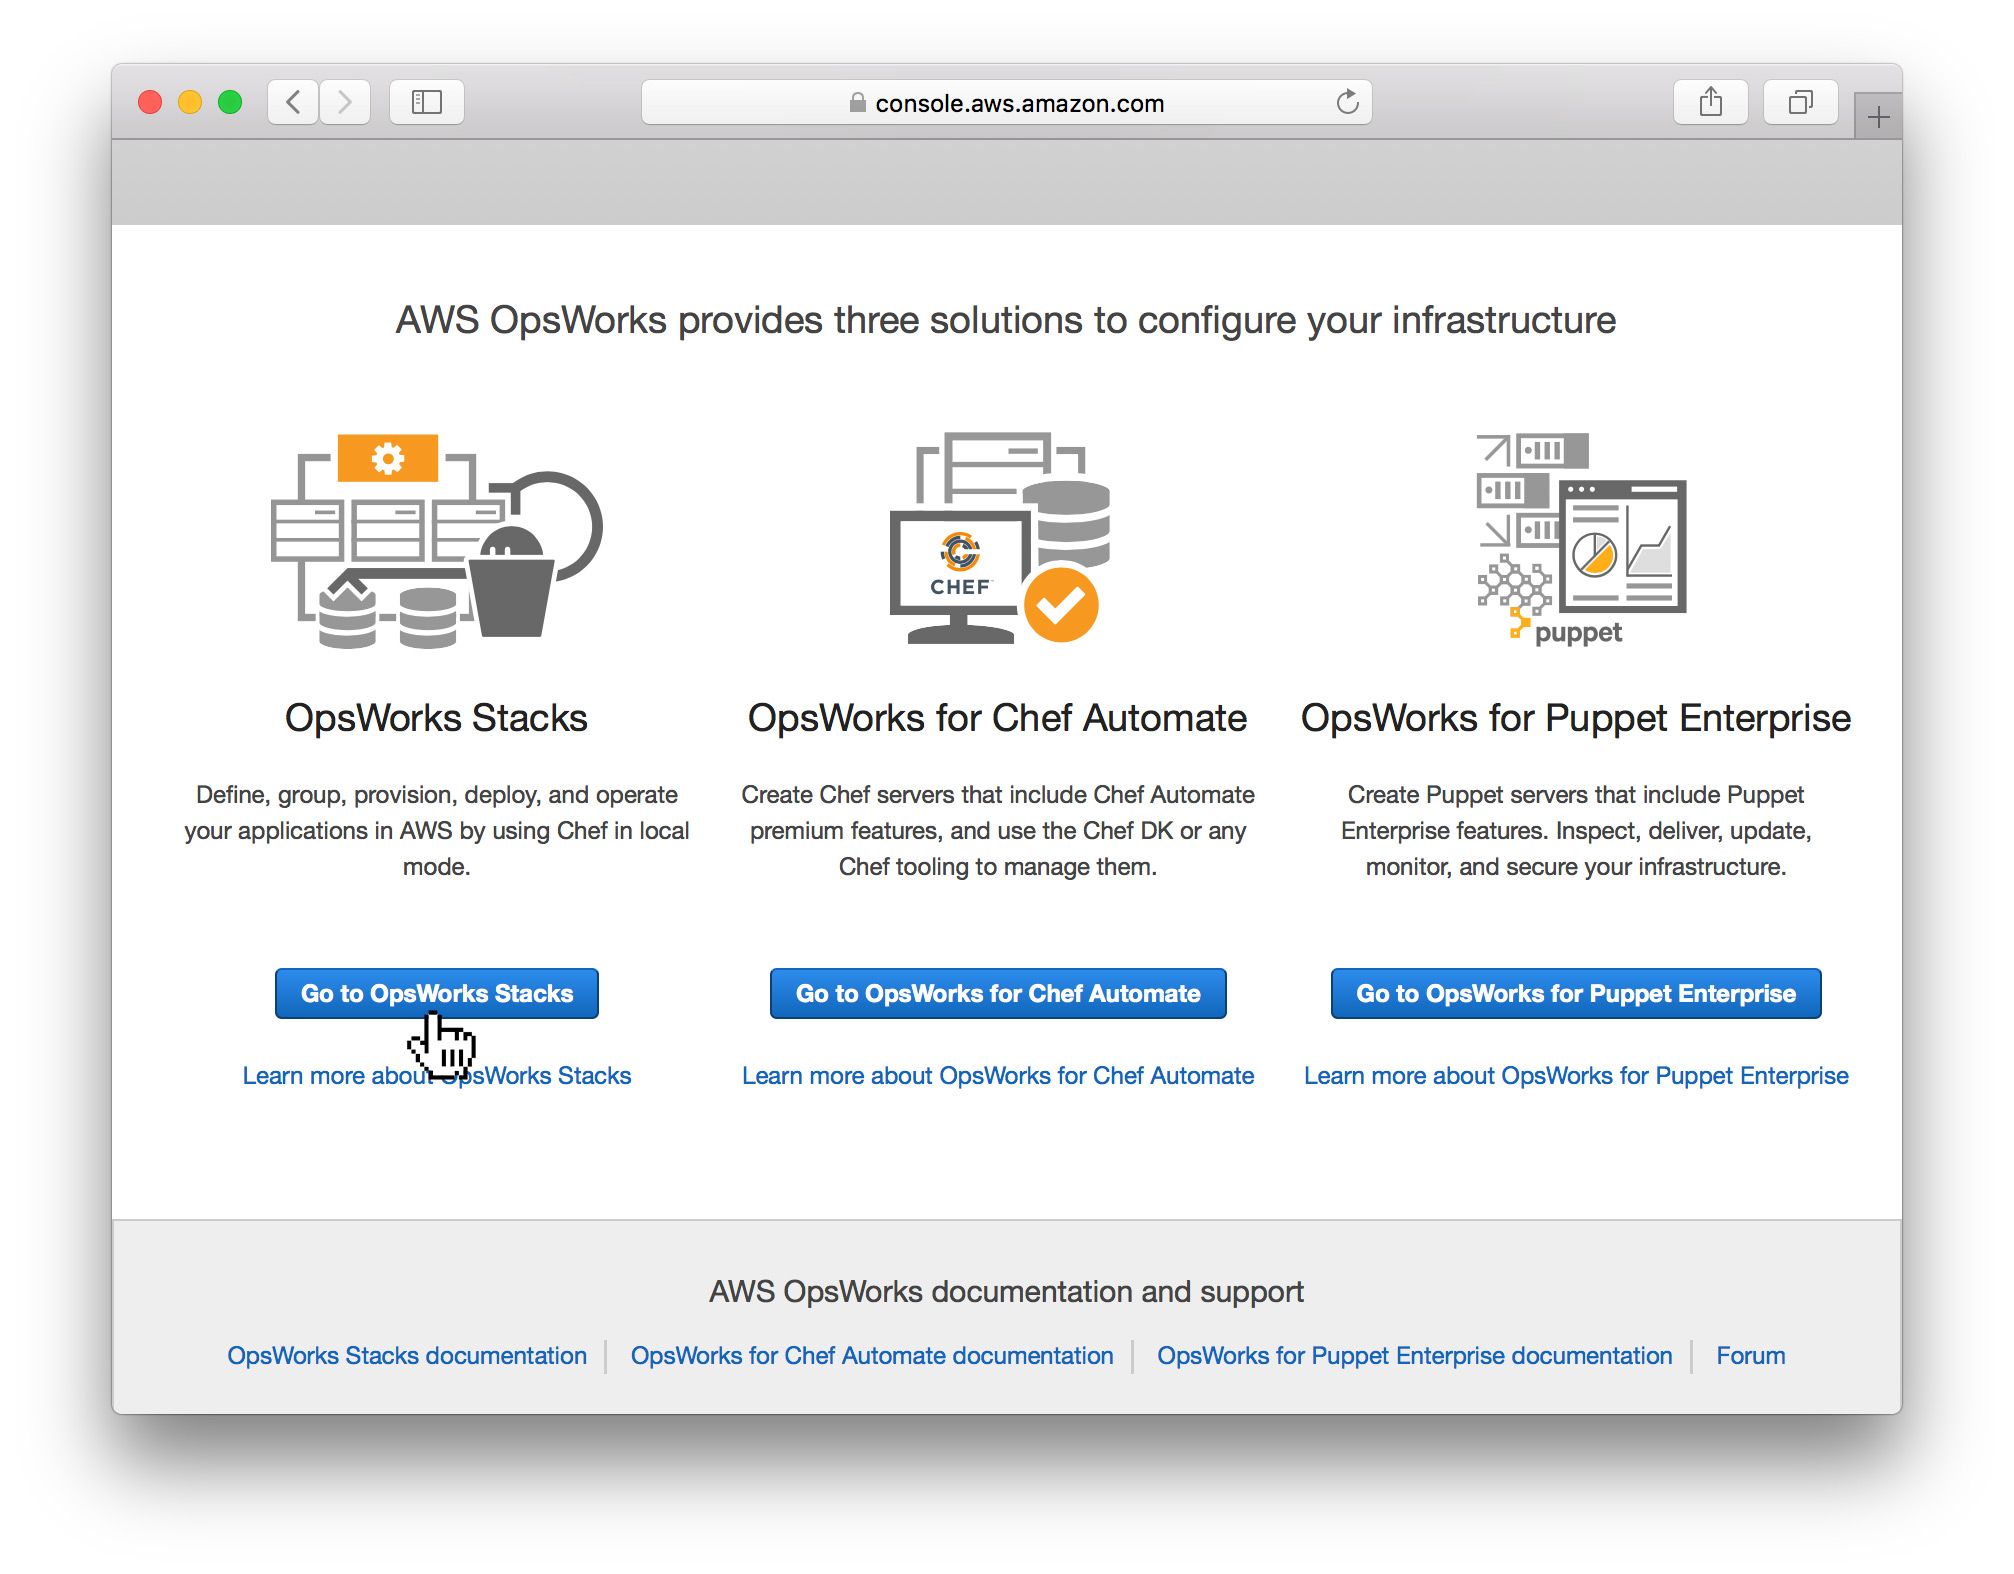
Let's now start configuring Opsworks on AWS. First, we need to create a new Opsworks Chef
stack. A stack is a collection of separate Amazon services (layers) that operate together
in order to properly run your application: server applications, databases, load balancers
and so on. Choose the Opsworks Stacks option from AWS Opsworks homepage:
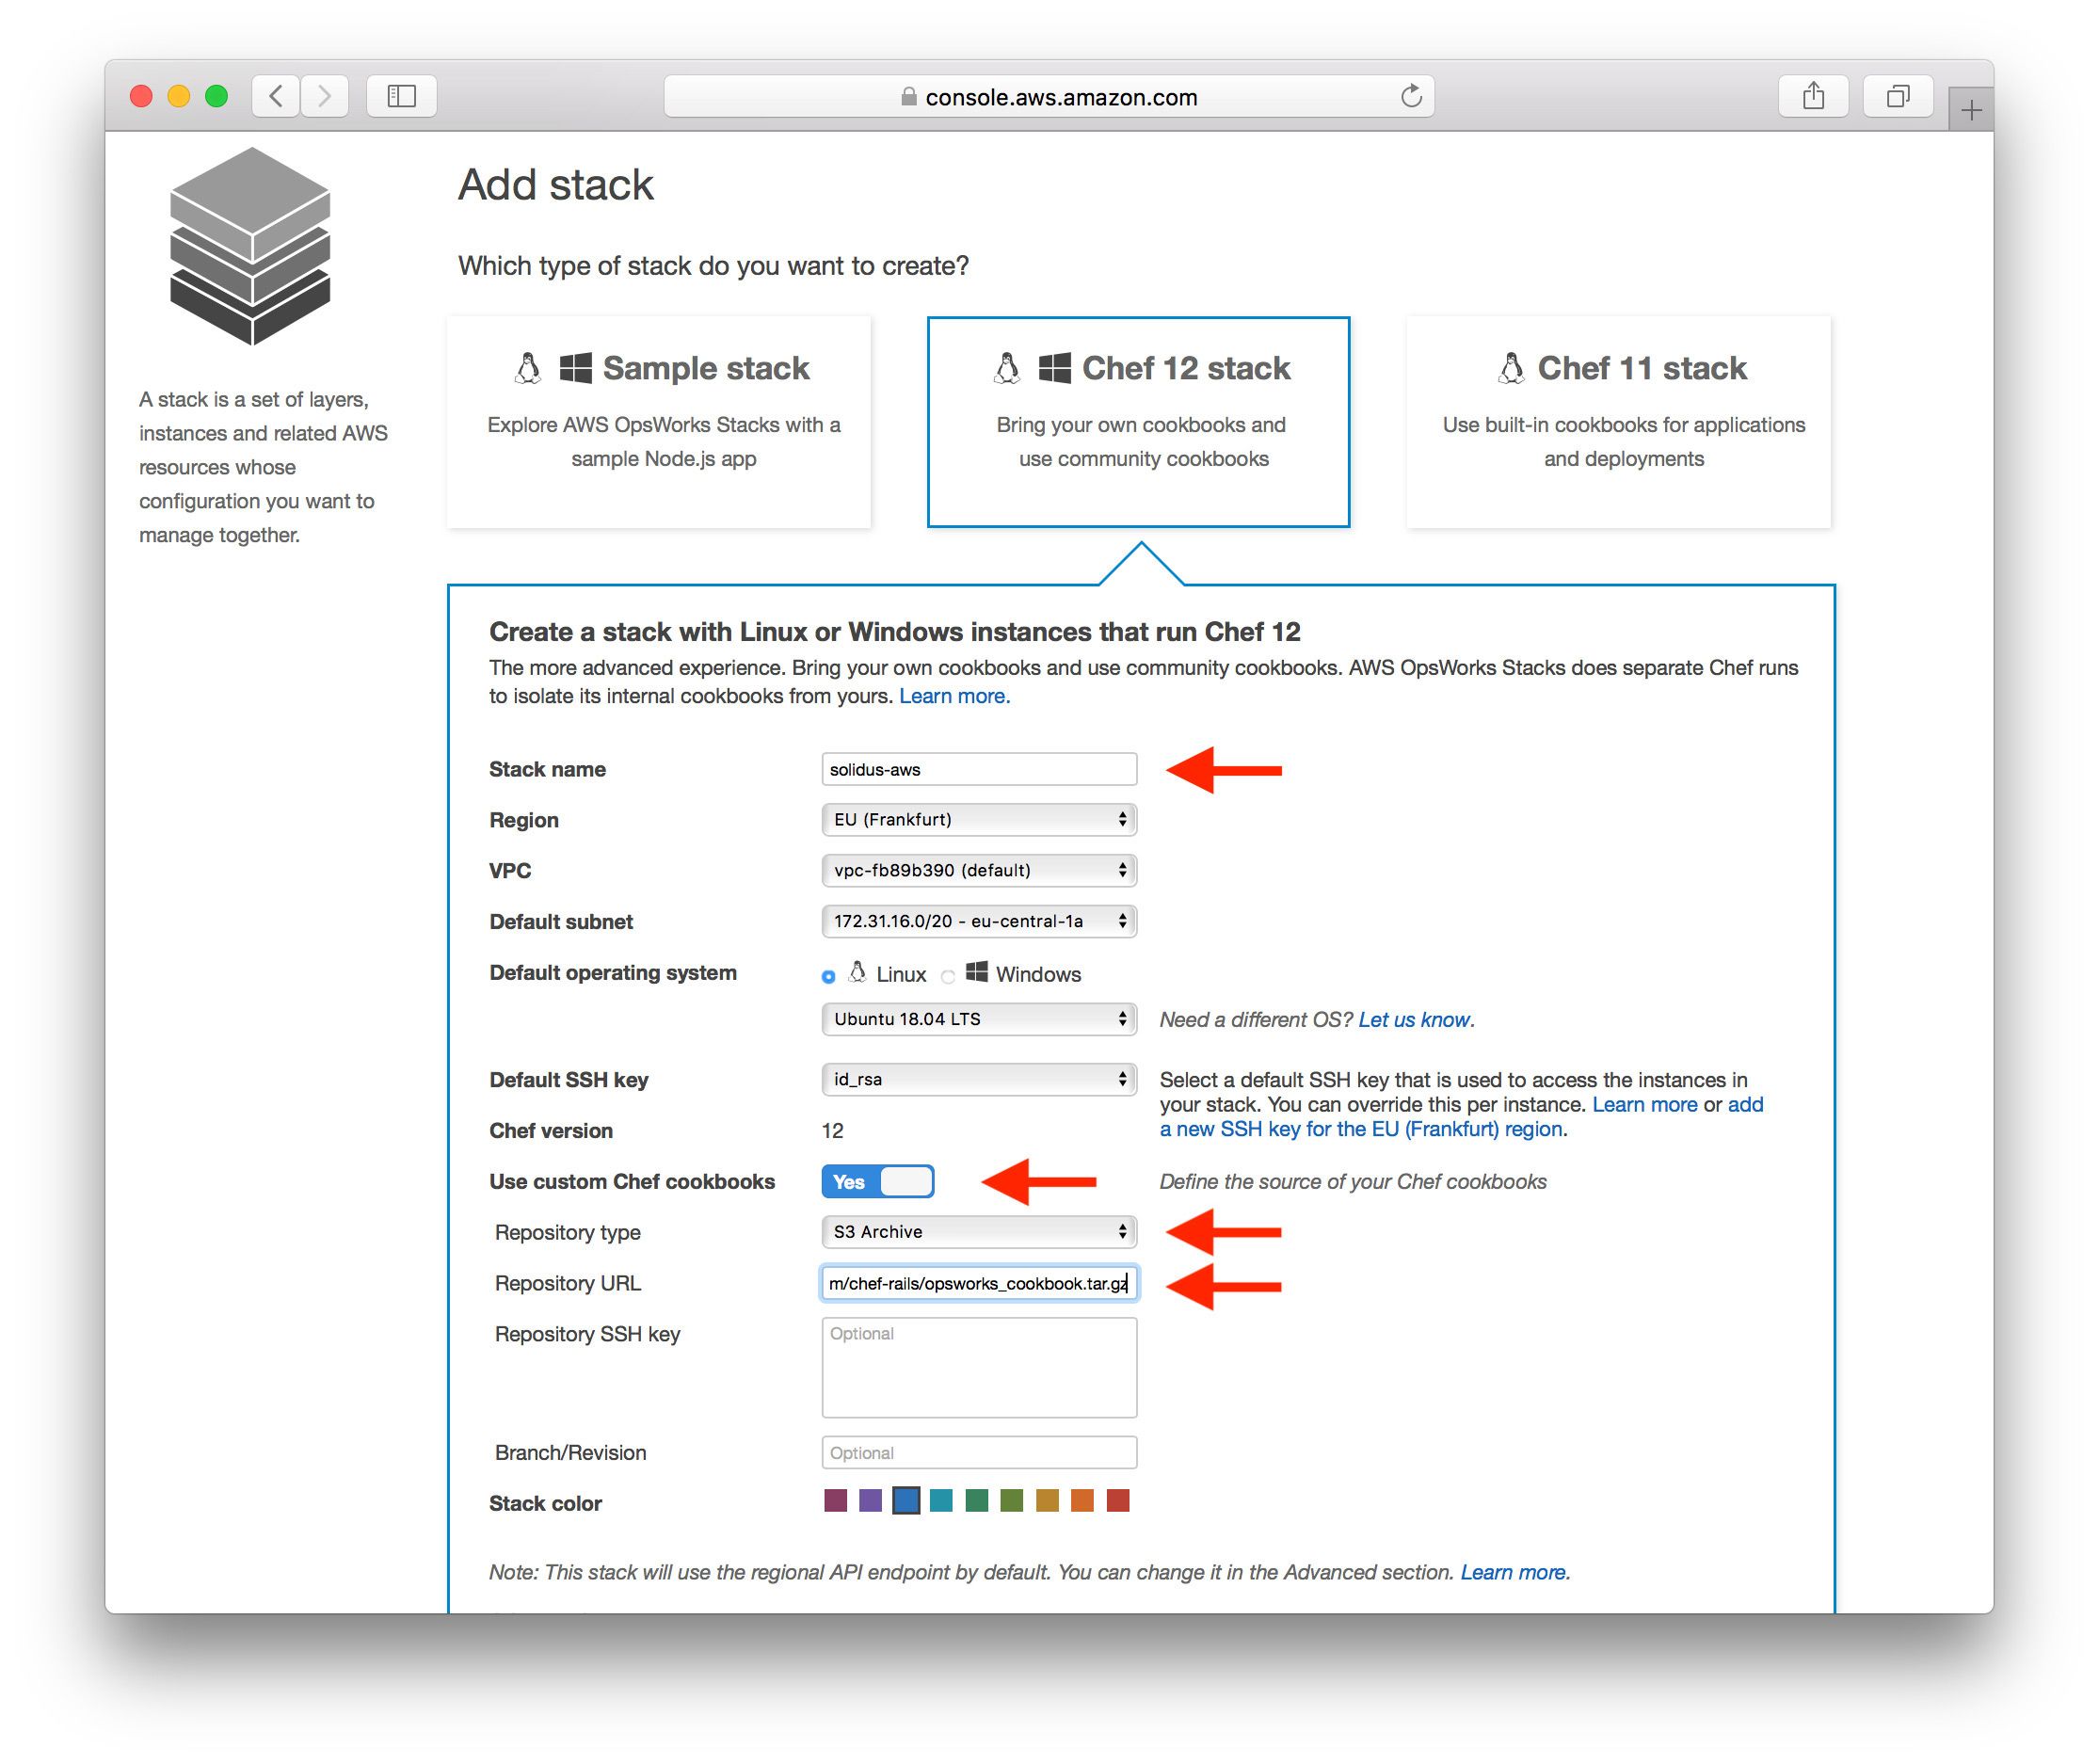
Click Add your first stack in the following page and you should eventually be able
to start configuring your stack, just follow the screenshots below.
Make sure the flag Use custom Chef cookbooks is set to true, choose S3 Archive as repository type and paste
the right cookbook file URL in Repository URL:
Add the Rails layer
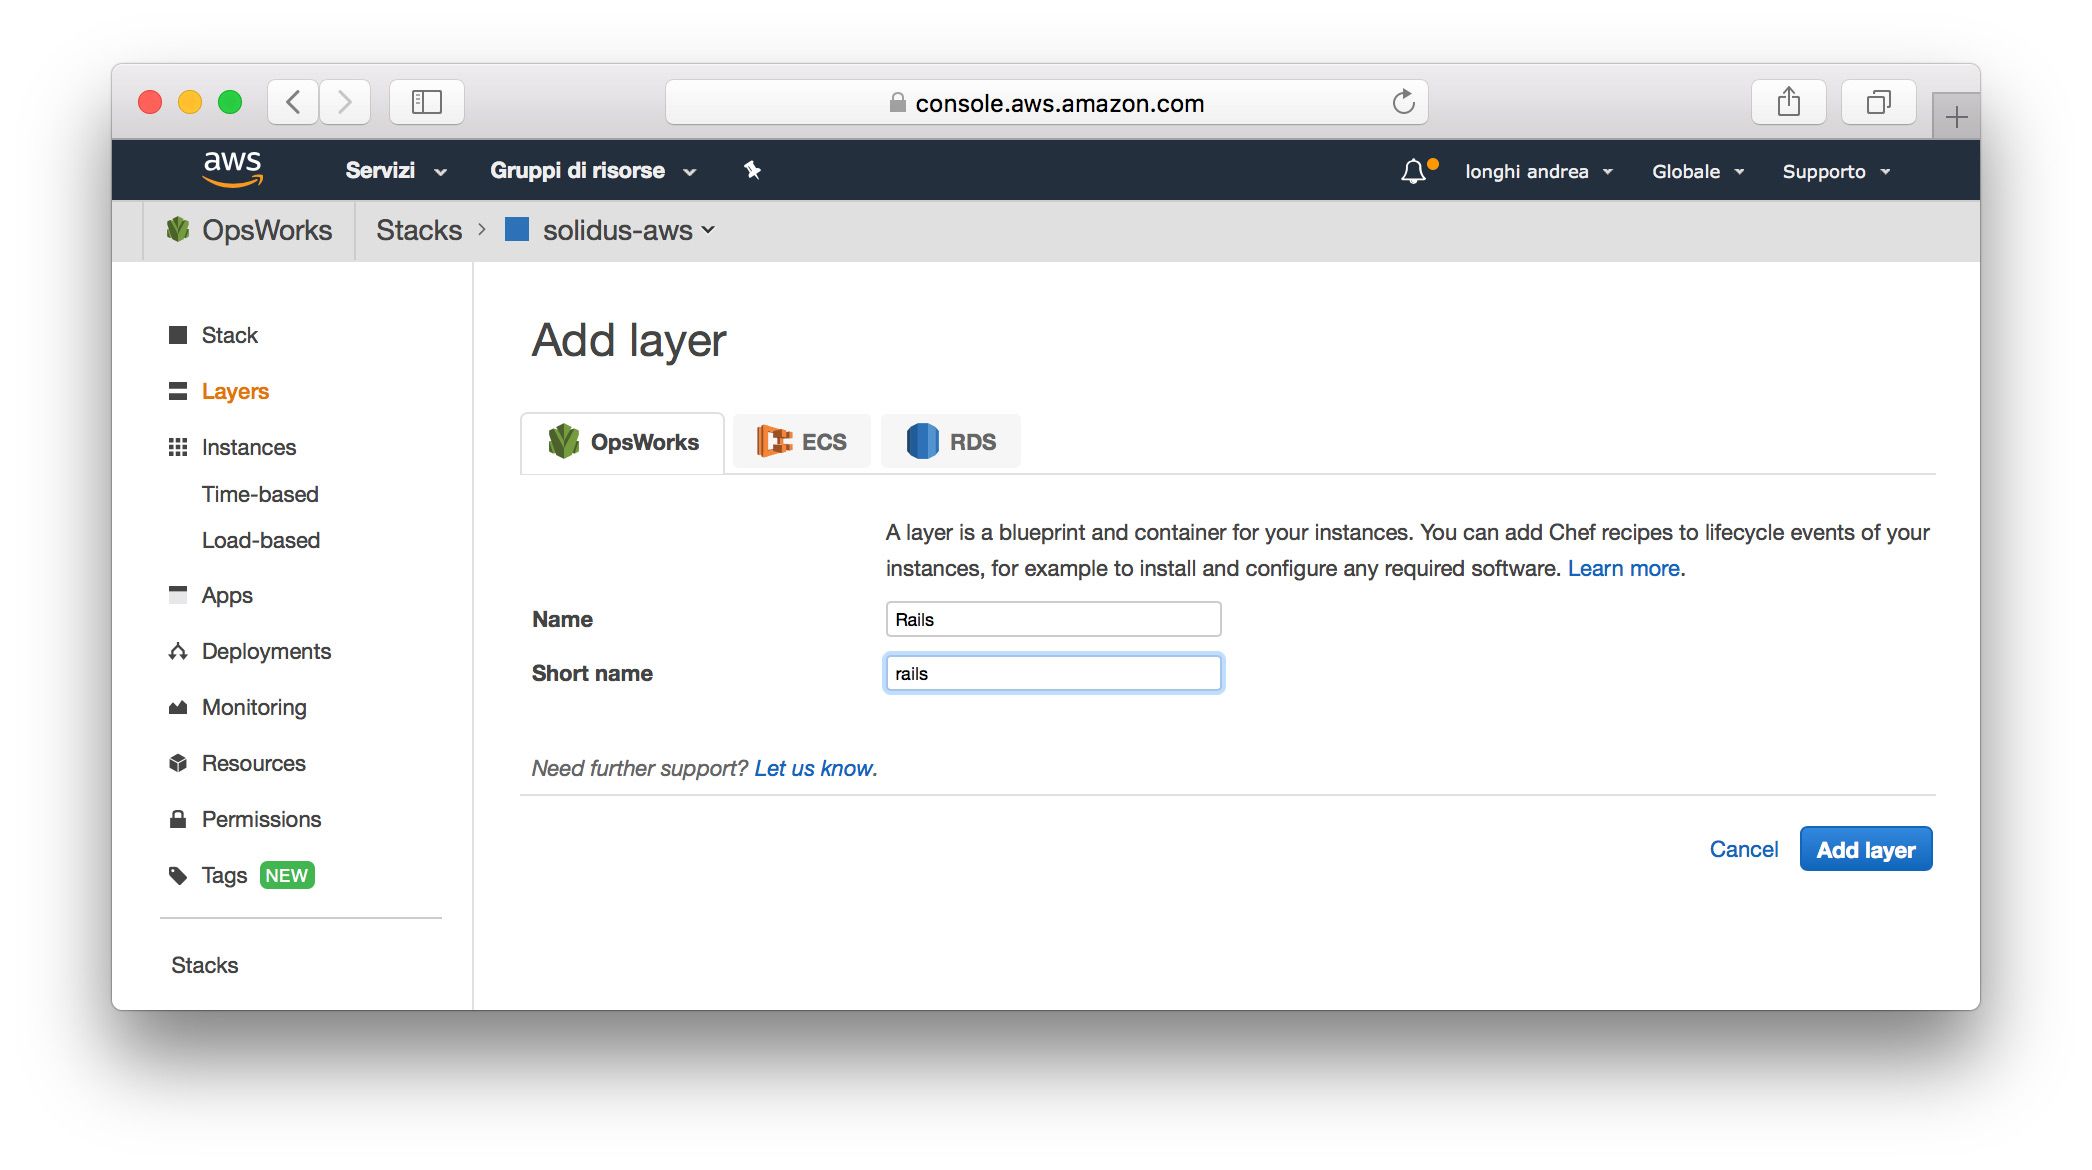
After being redirected to a new page with a success message, you can now click on Add a layer and give
the layer a name and a short name (I used Rails):
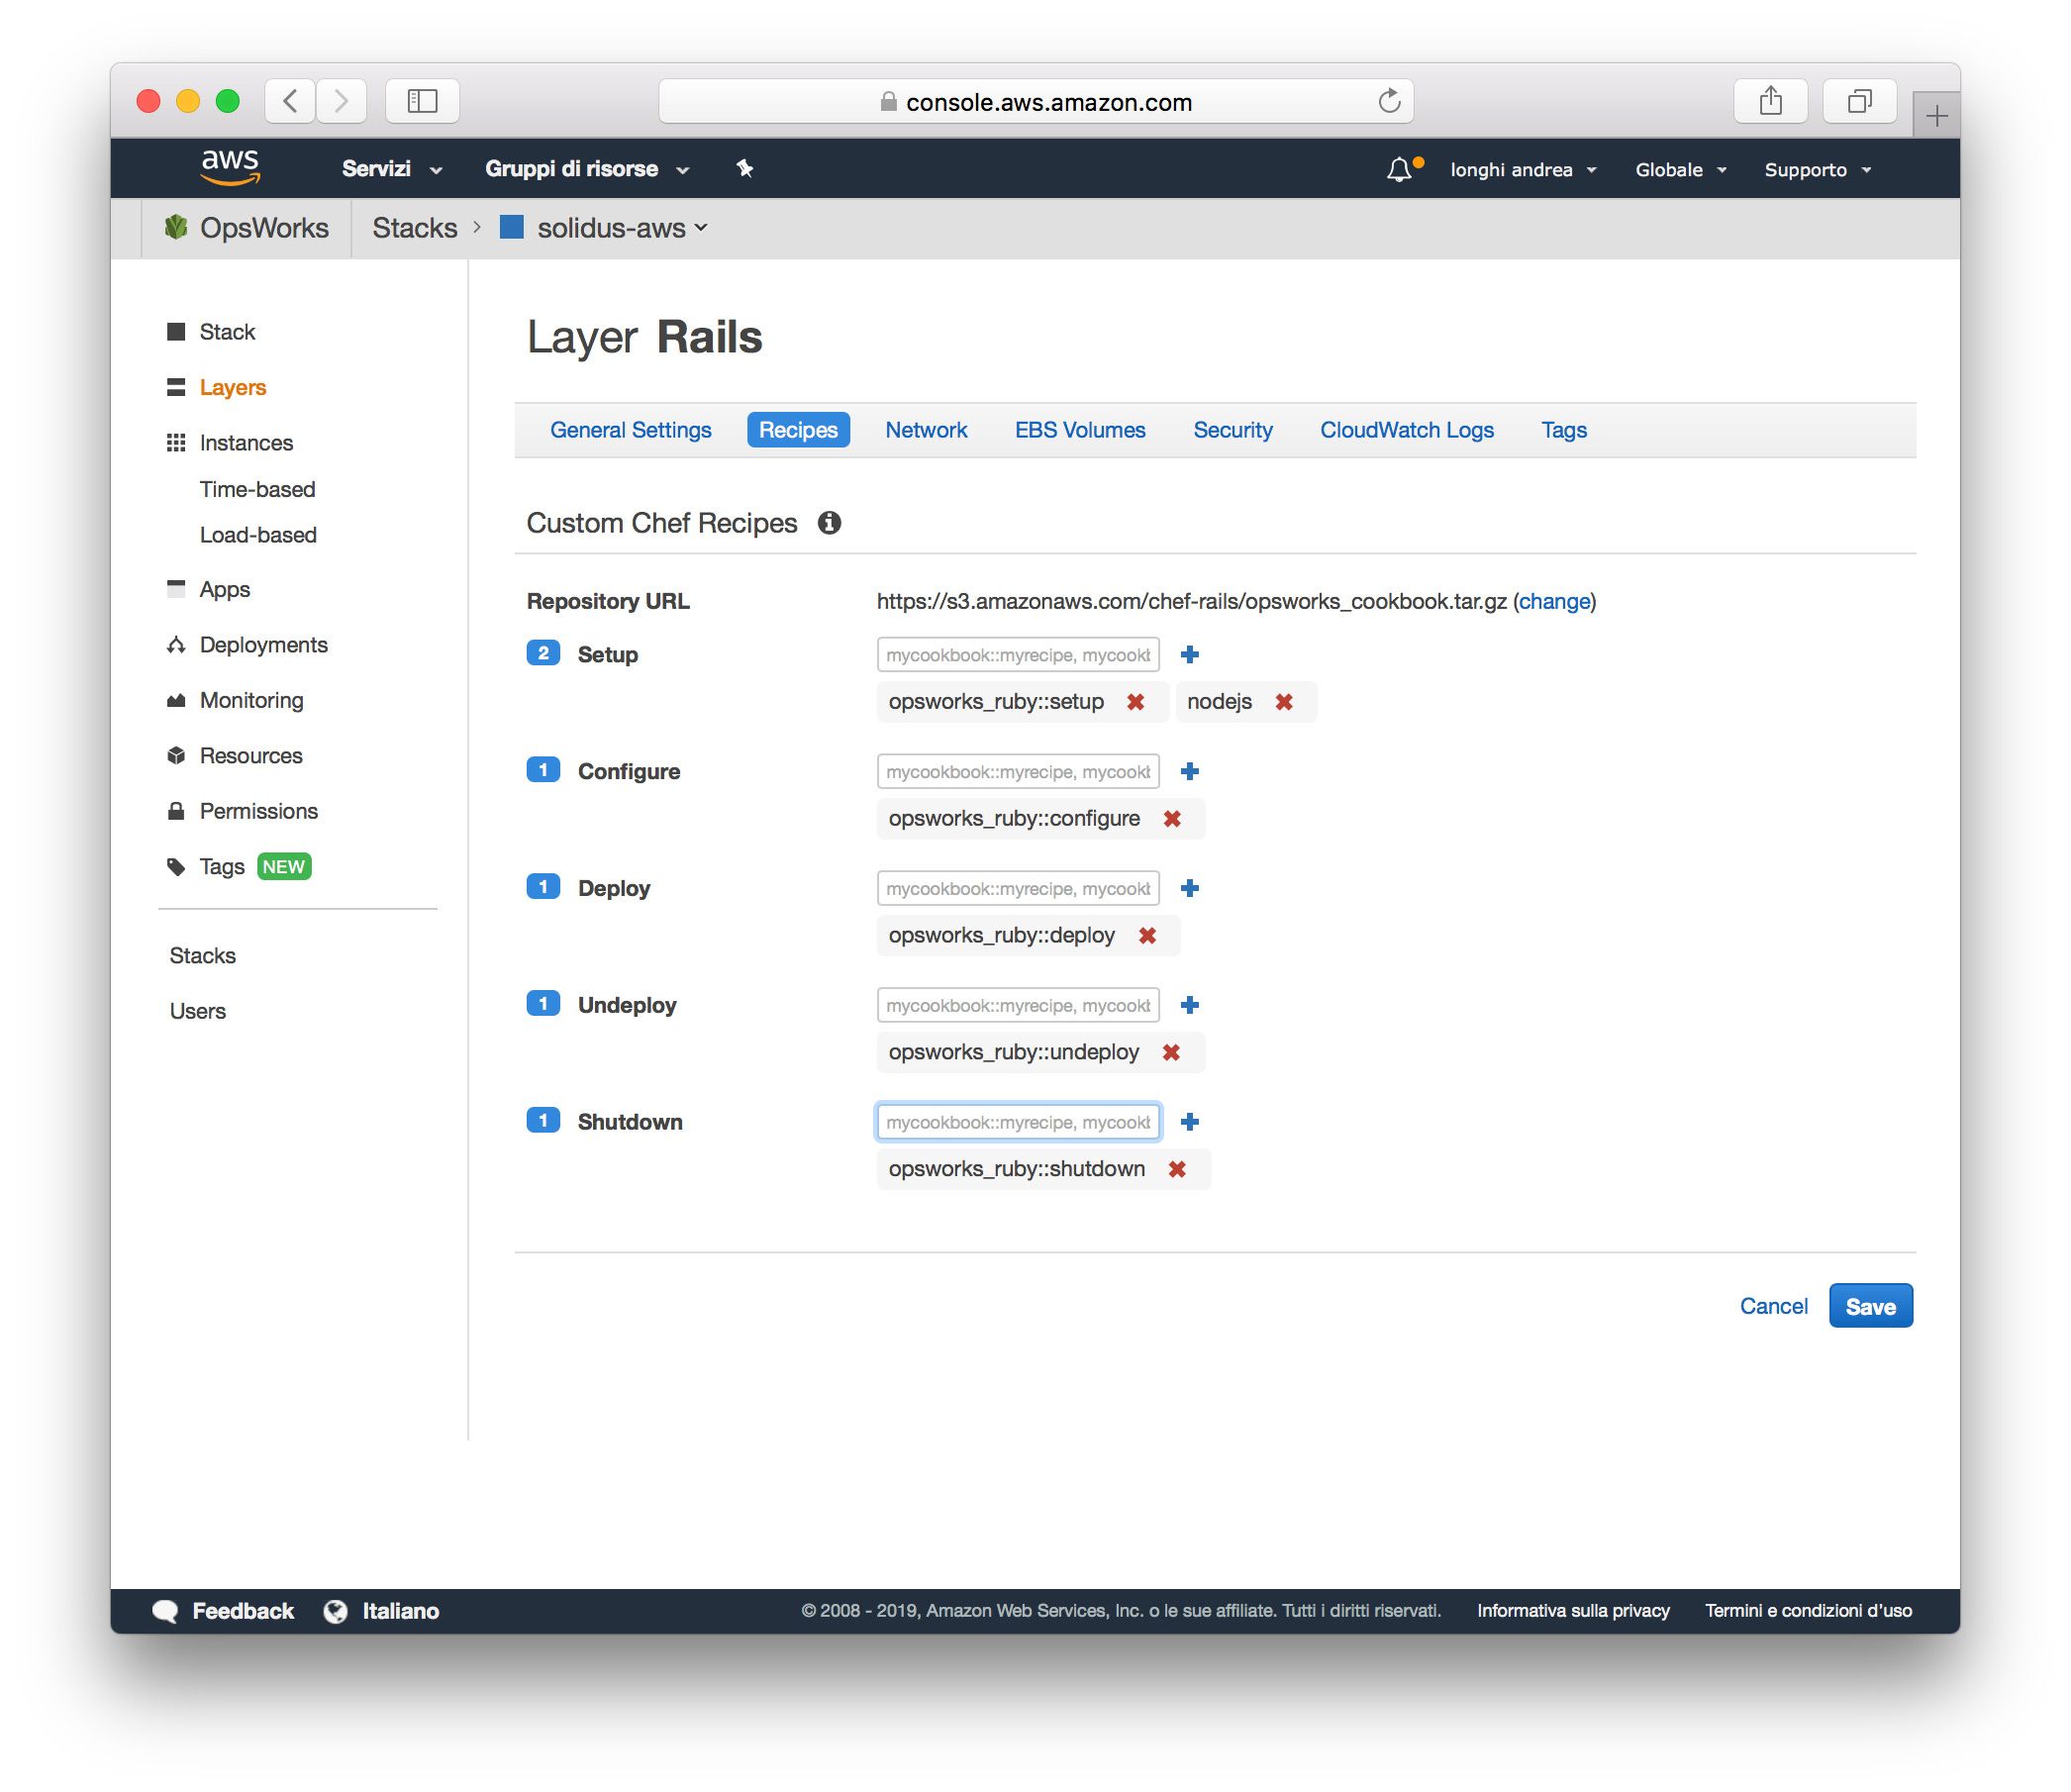
Rails layer recipes
After that we're going to add our recipes to it... remember to click the blue button + every time you add a recipe and
eventually Save when you're done:
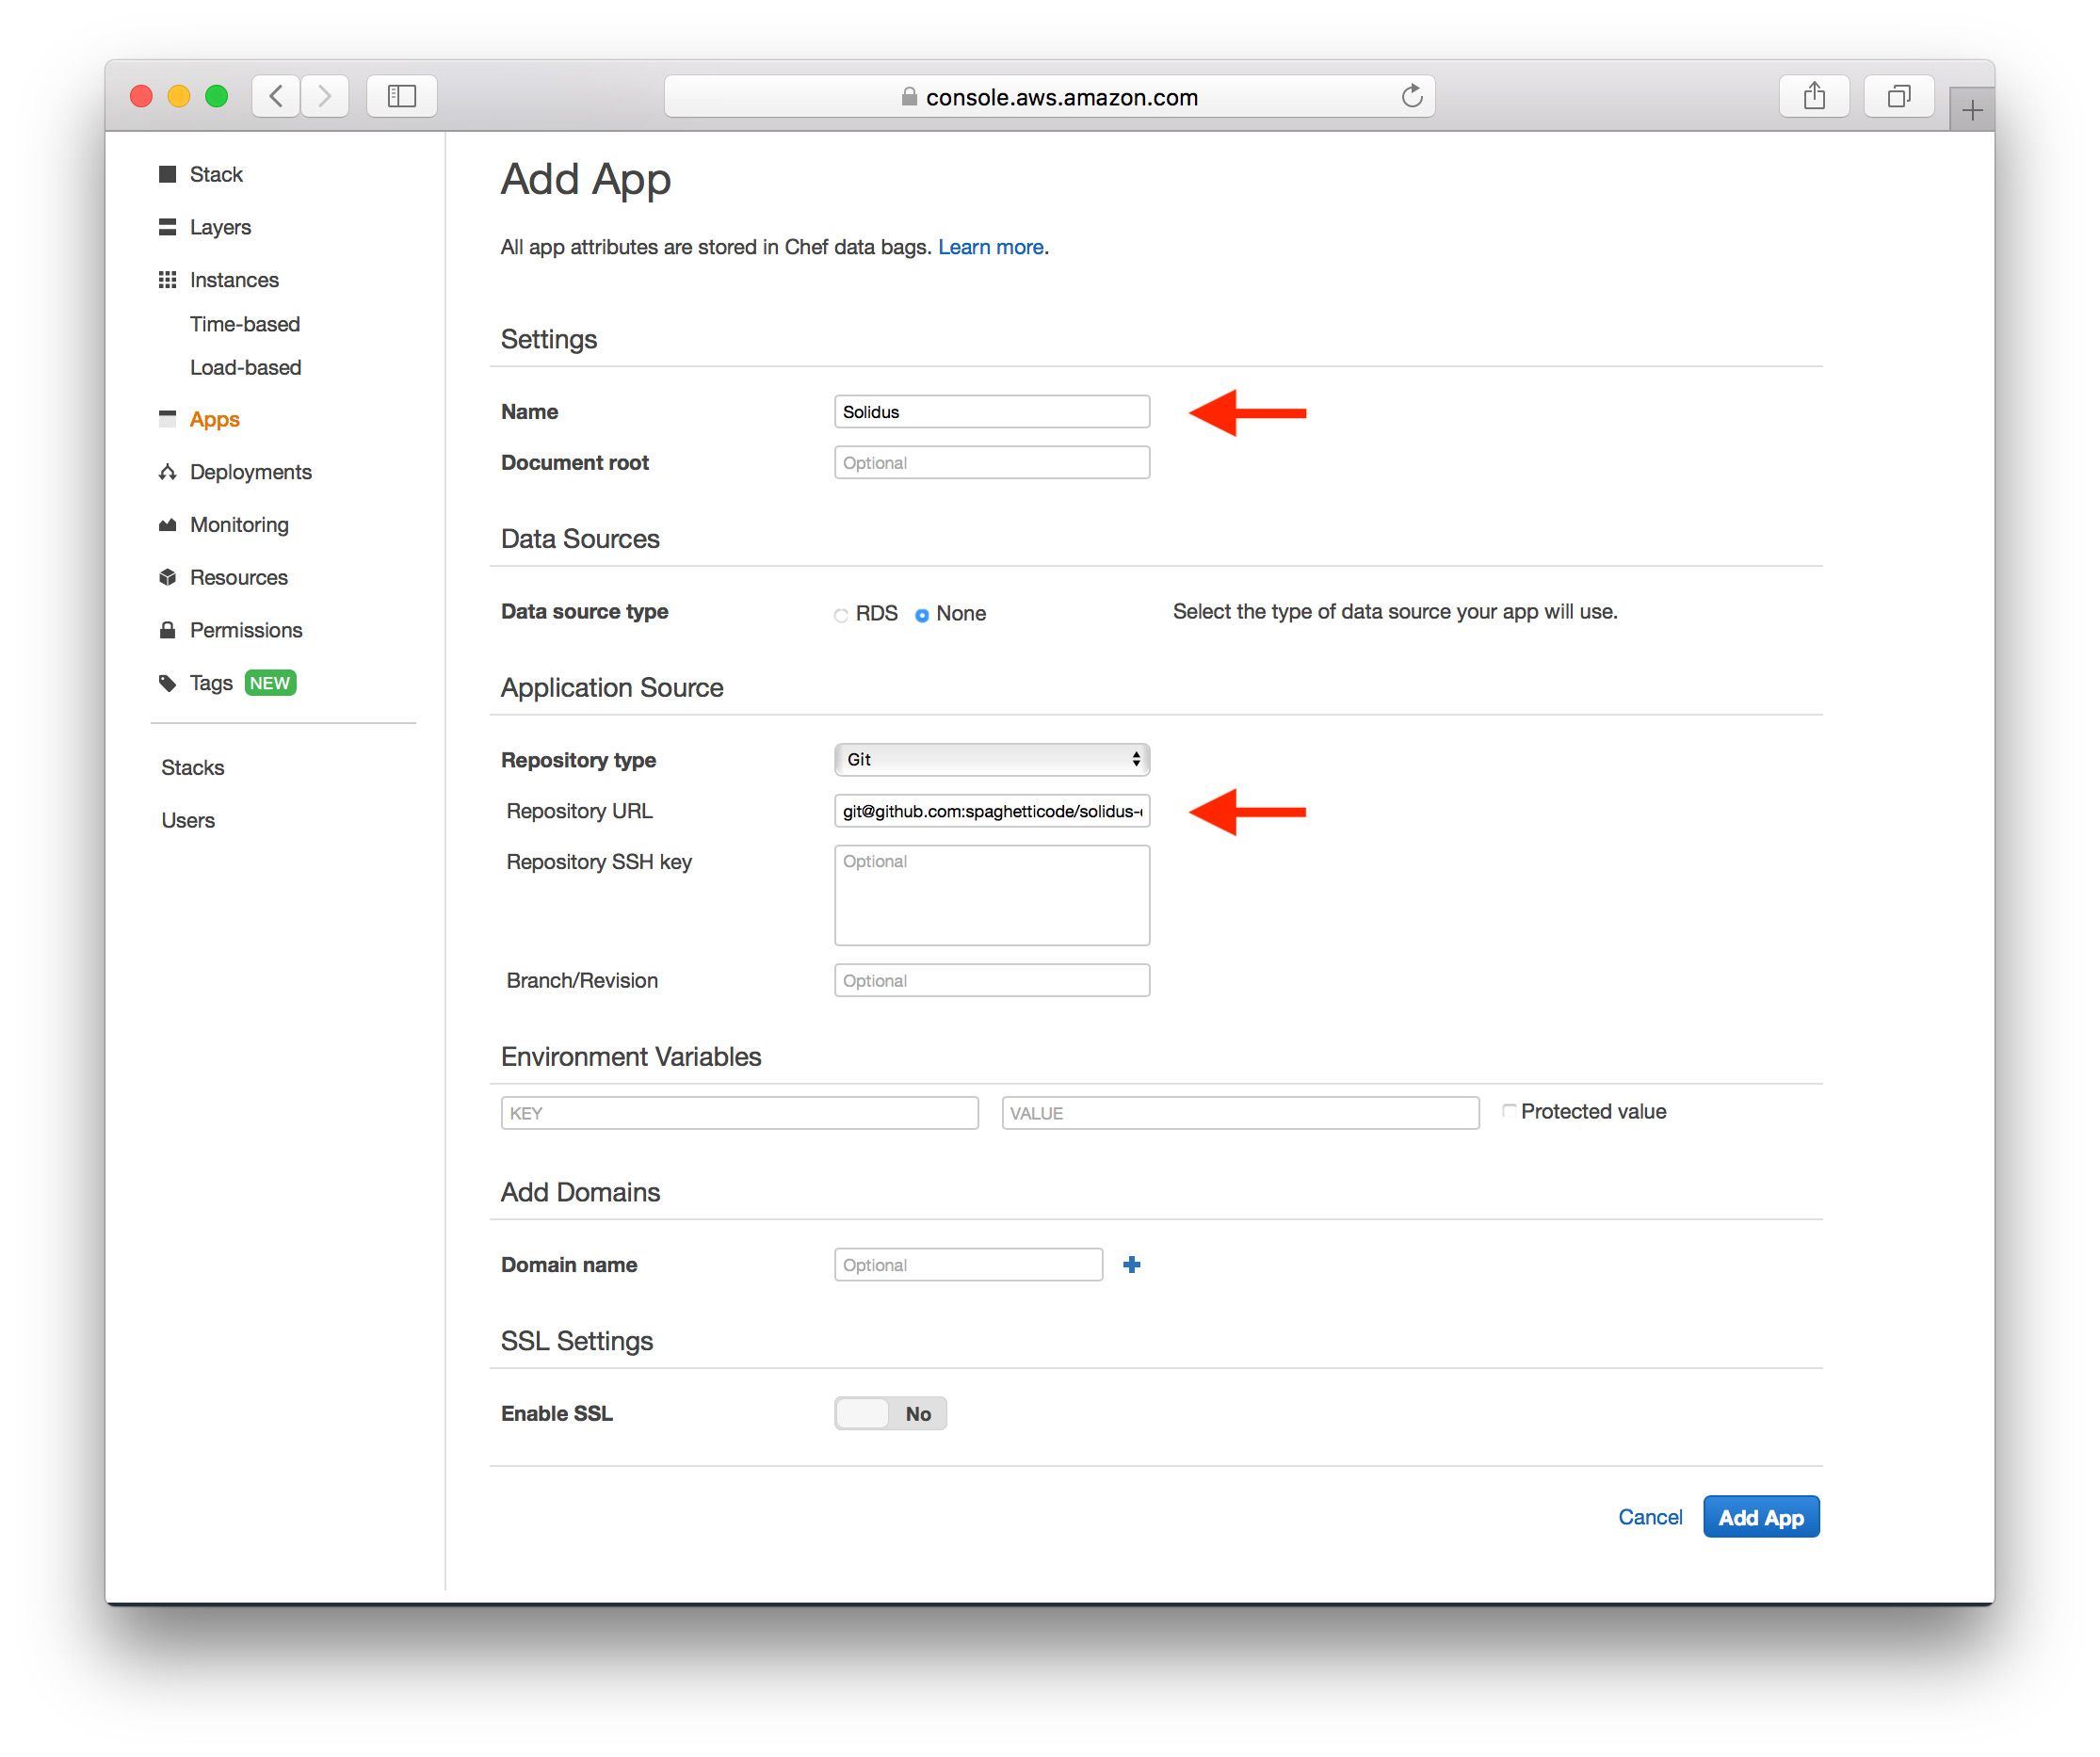
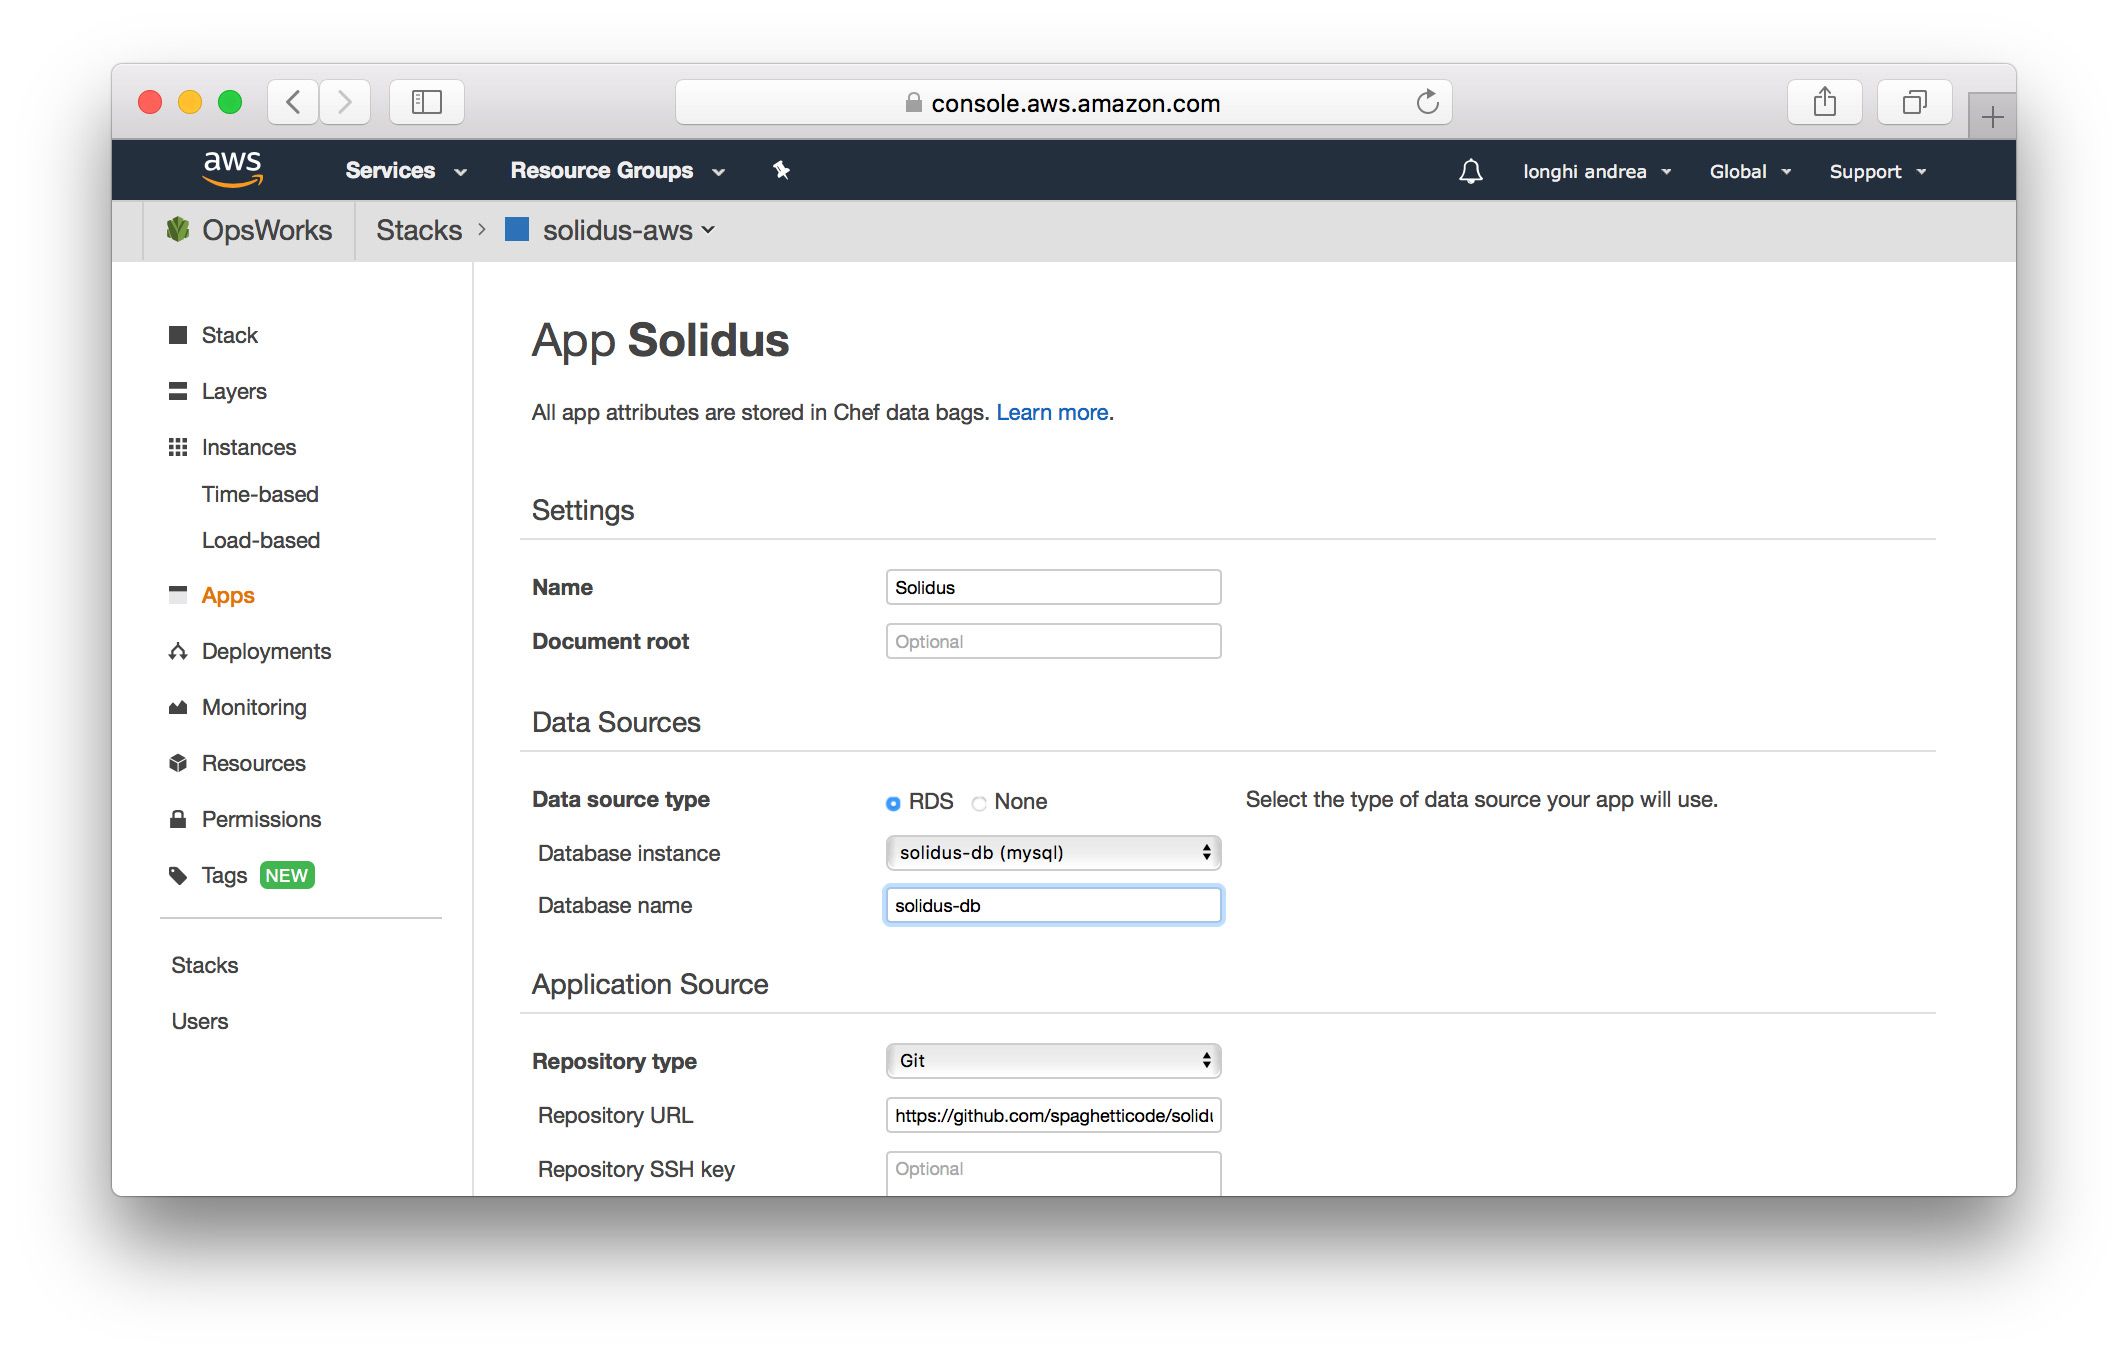
Add the Rails app
Let's now add the actual Rails app to the stack. Click on Apps on the navigation sidebar, and fill in the
data by following the screenshot example. Put the link to your github app source code in the field
Repository URL. Click Add App and you're done:
Add an app instance
Now click on Instances on the navigation bar. Then click on Add an instance and fill in the
form as follows:
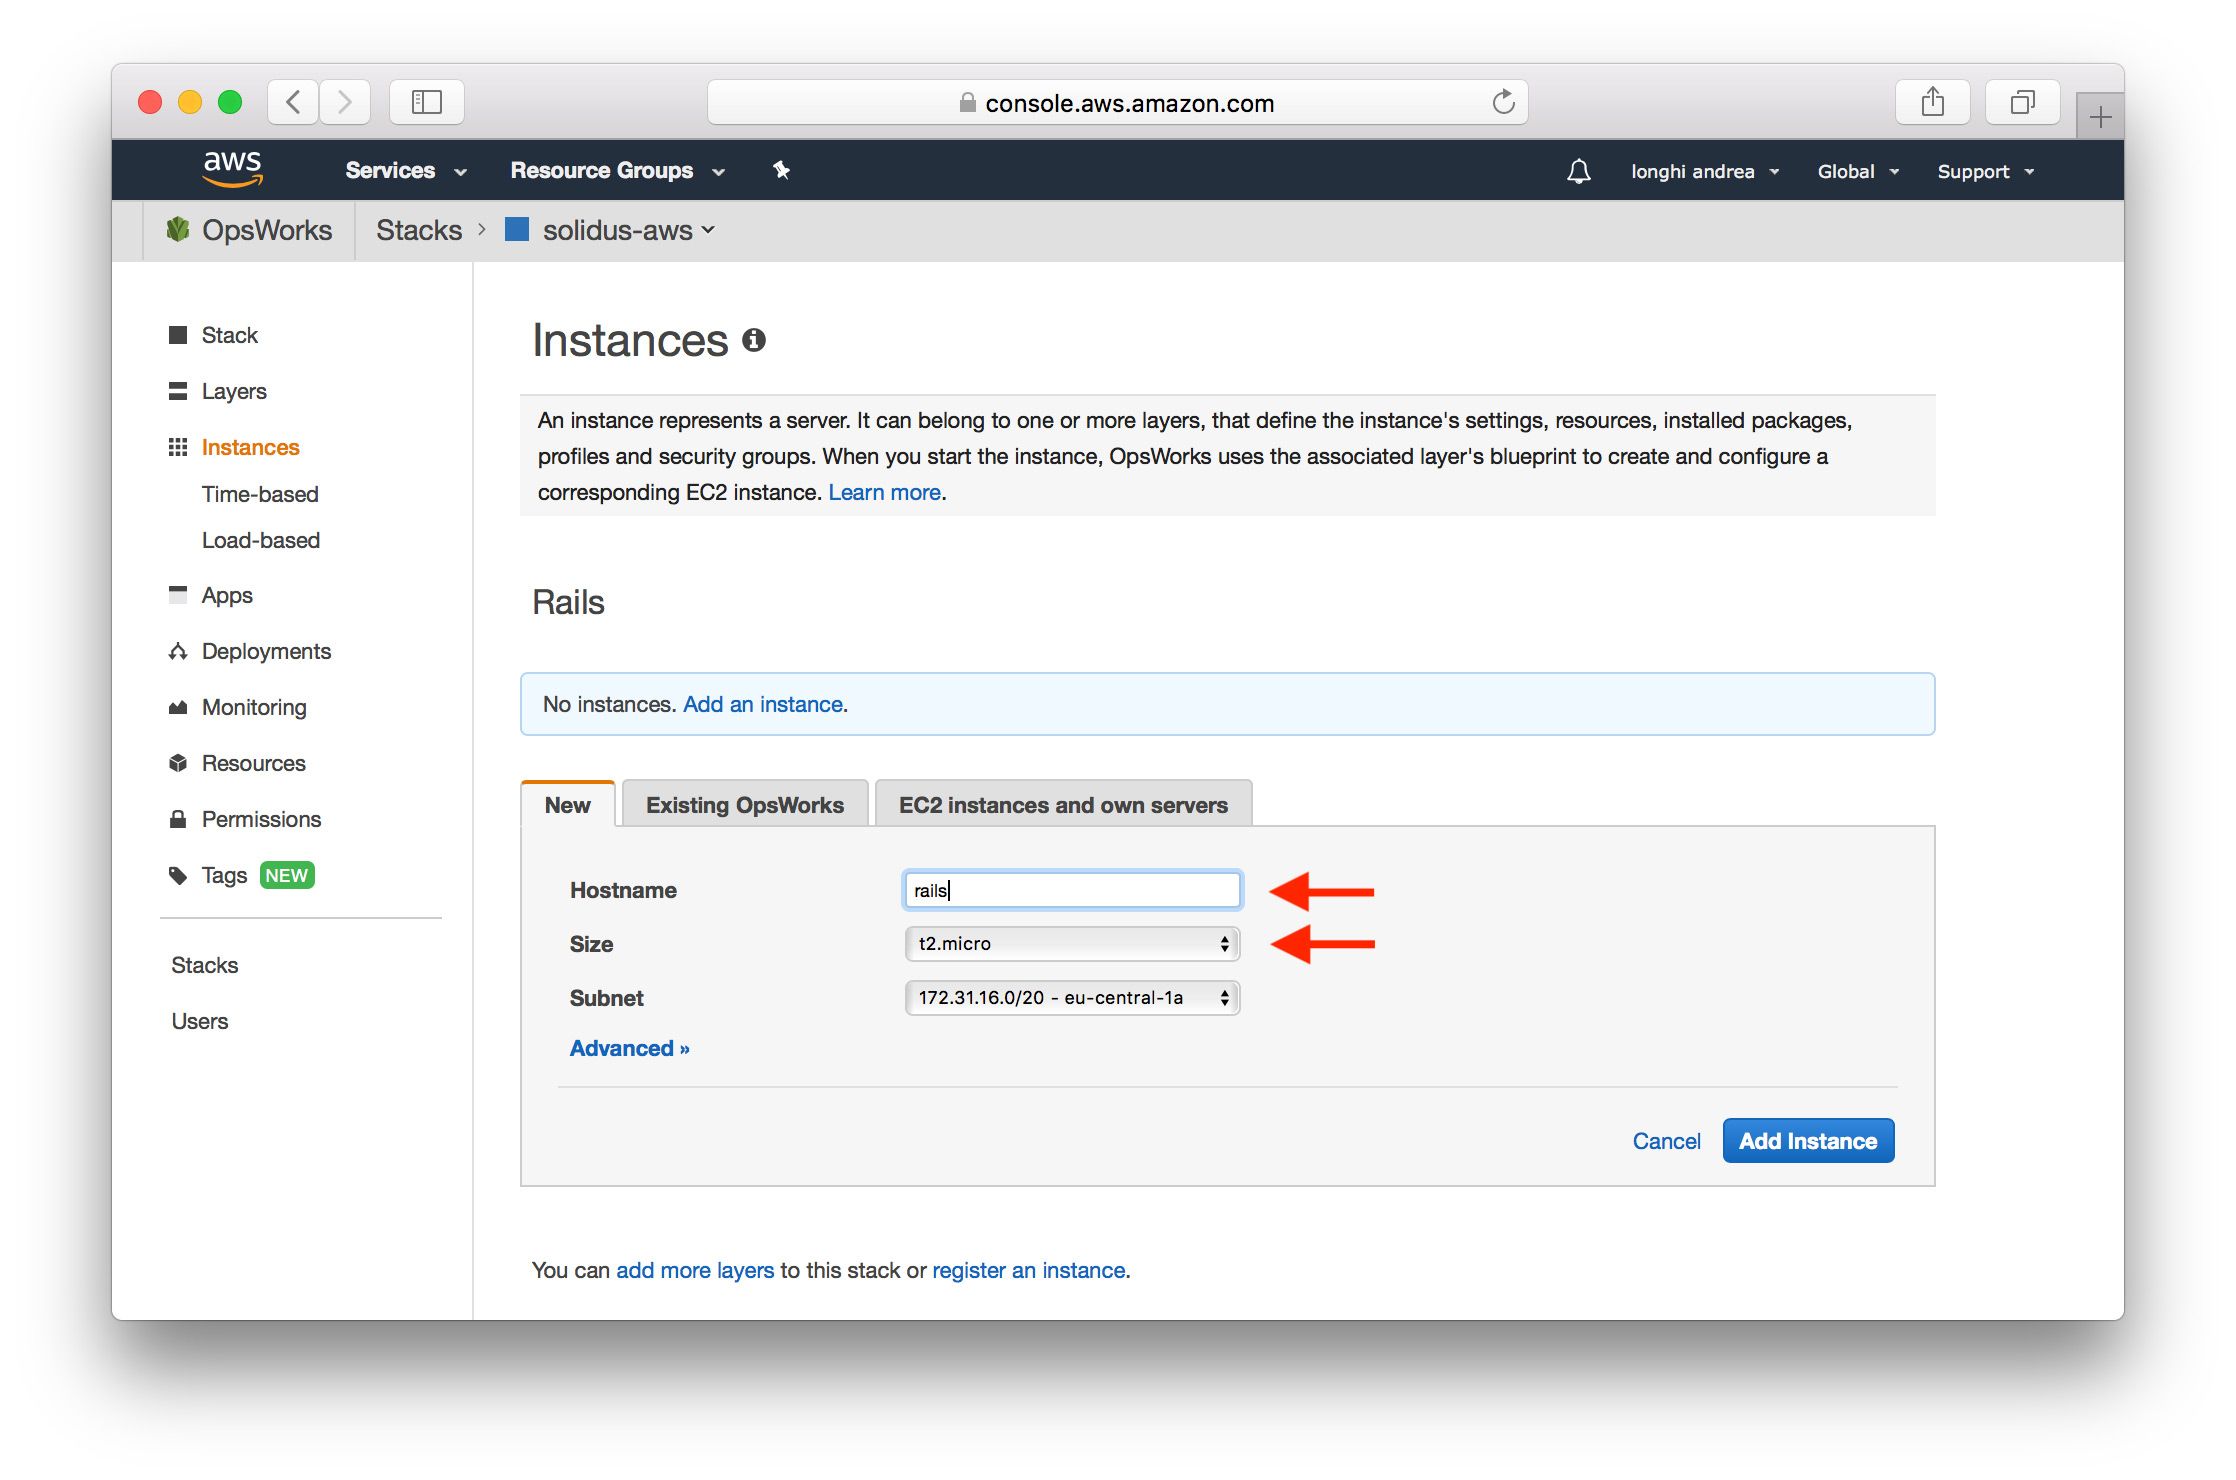
I'm using a t2.micro instance here, please choose wisely on your side as larger Amazon VMs can
become expensive!
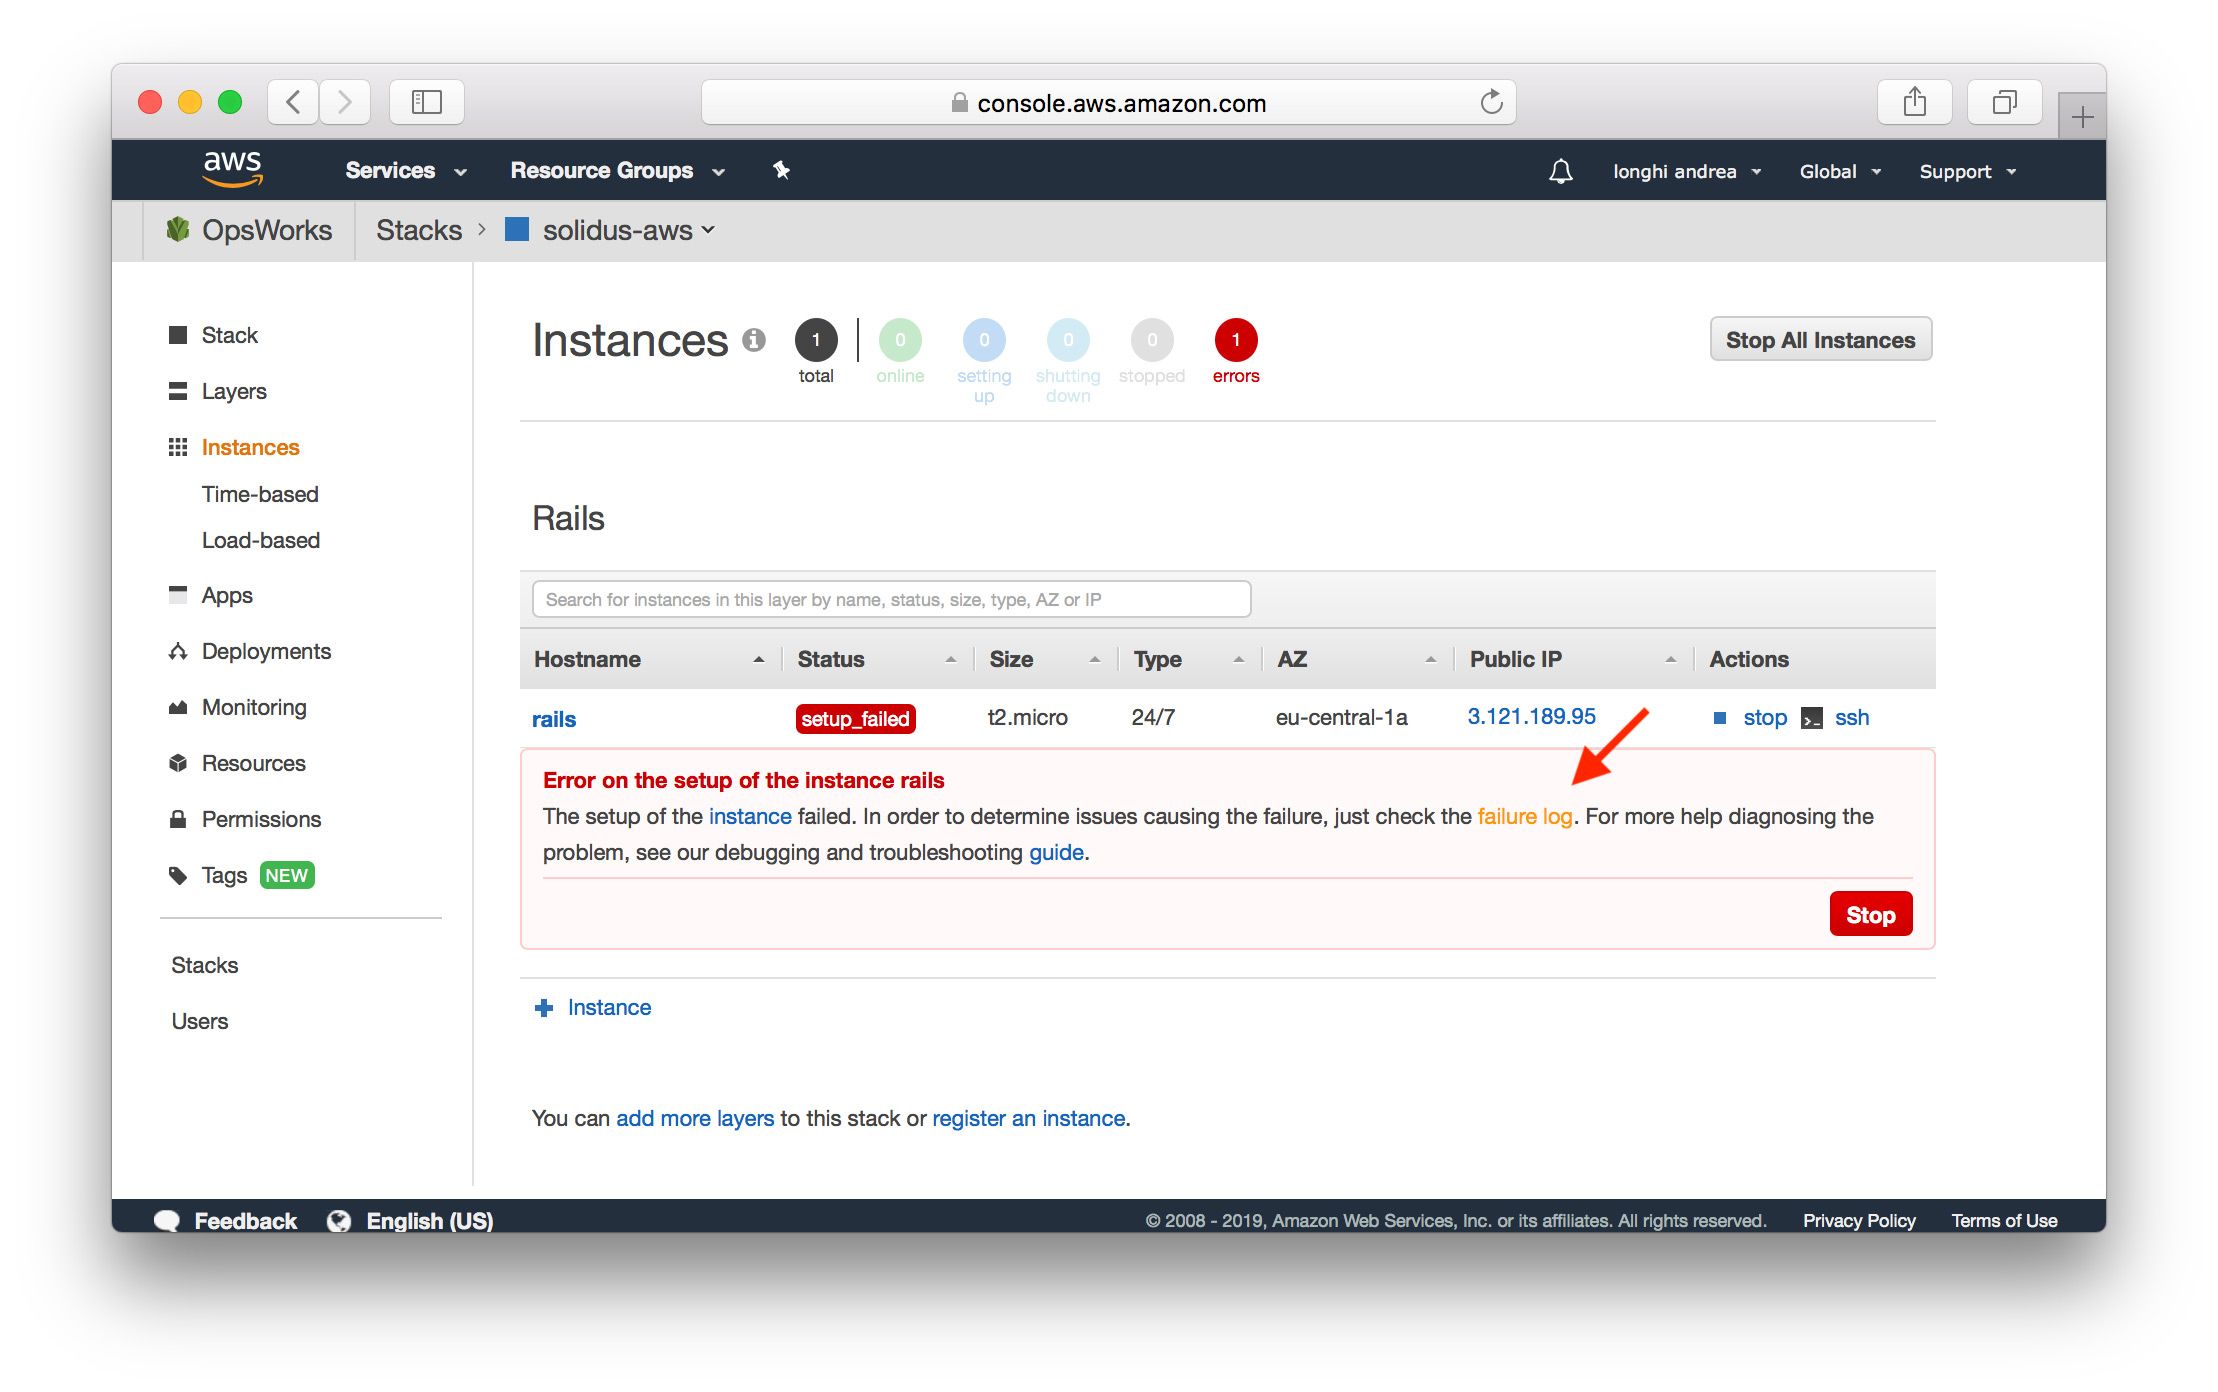
You can now start the instance, Opsworks will attempt to deploy automatically:
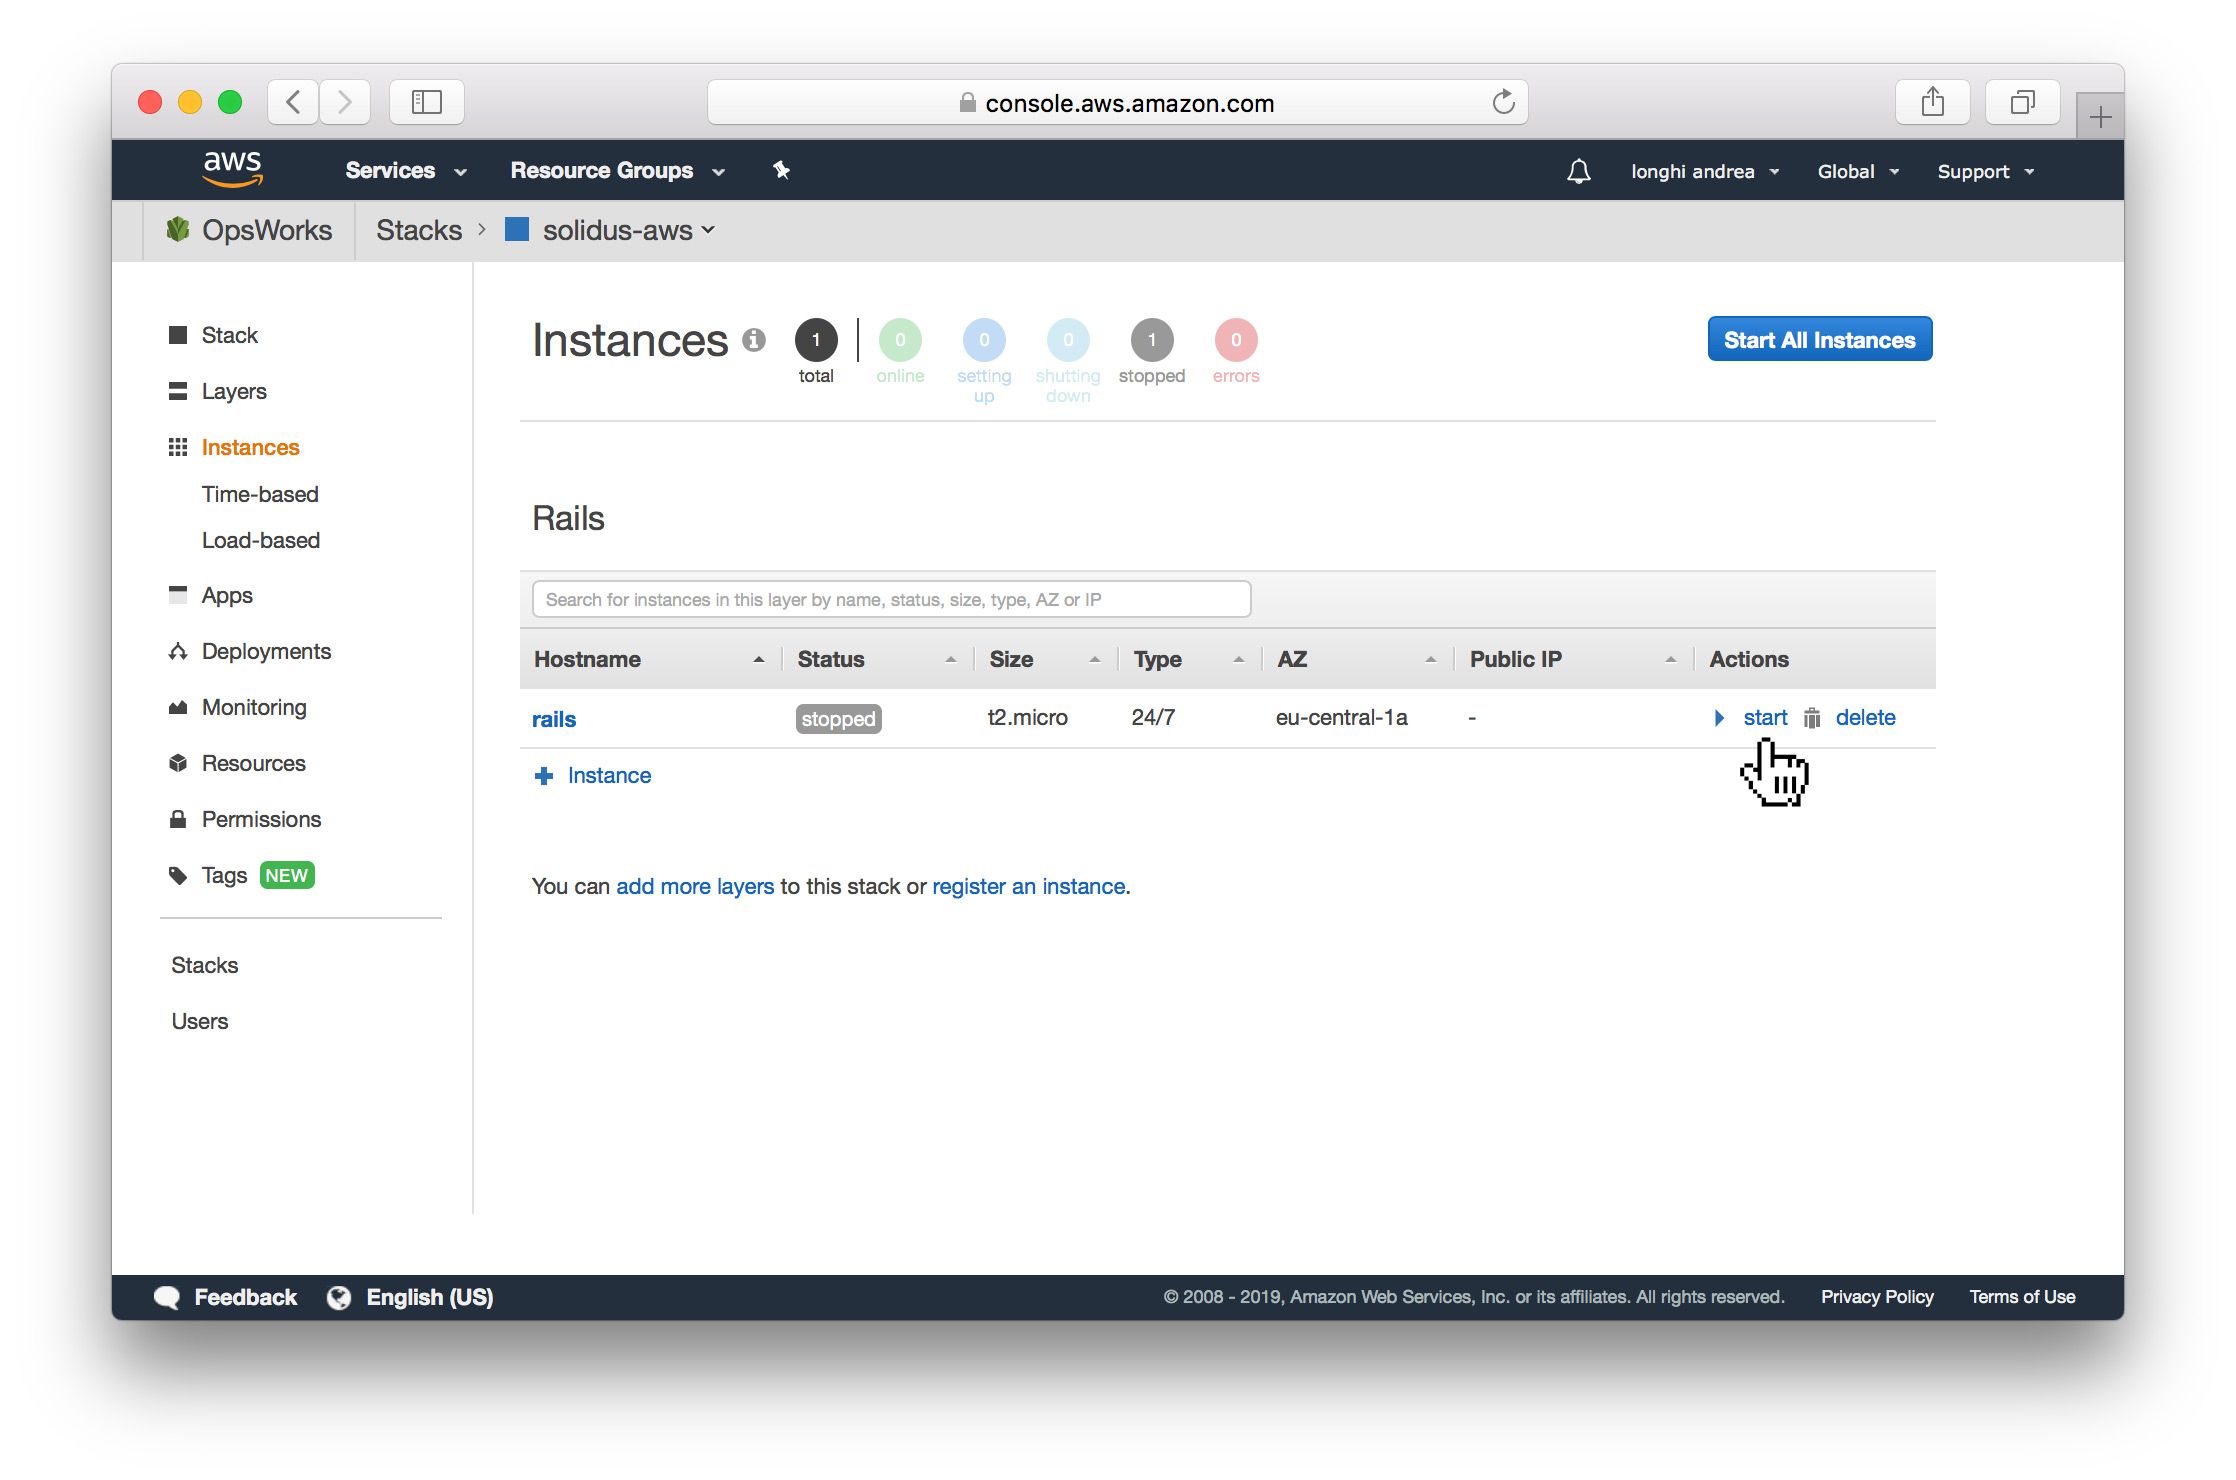
We still have a lot of ground to cover, so don't be disappointed when the deploy fails.
Check the failure log and familarize yourself with it as you'll probably have to fix other issues
on your own in the future, besides the ones we're going to tackle today:

Add the database
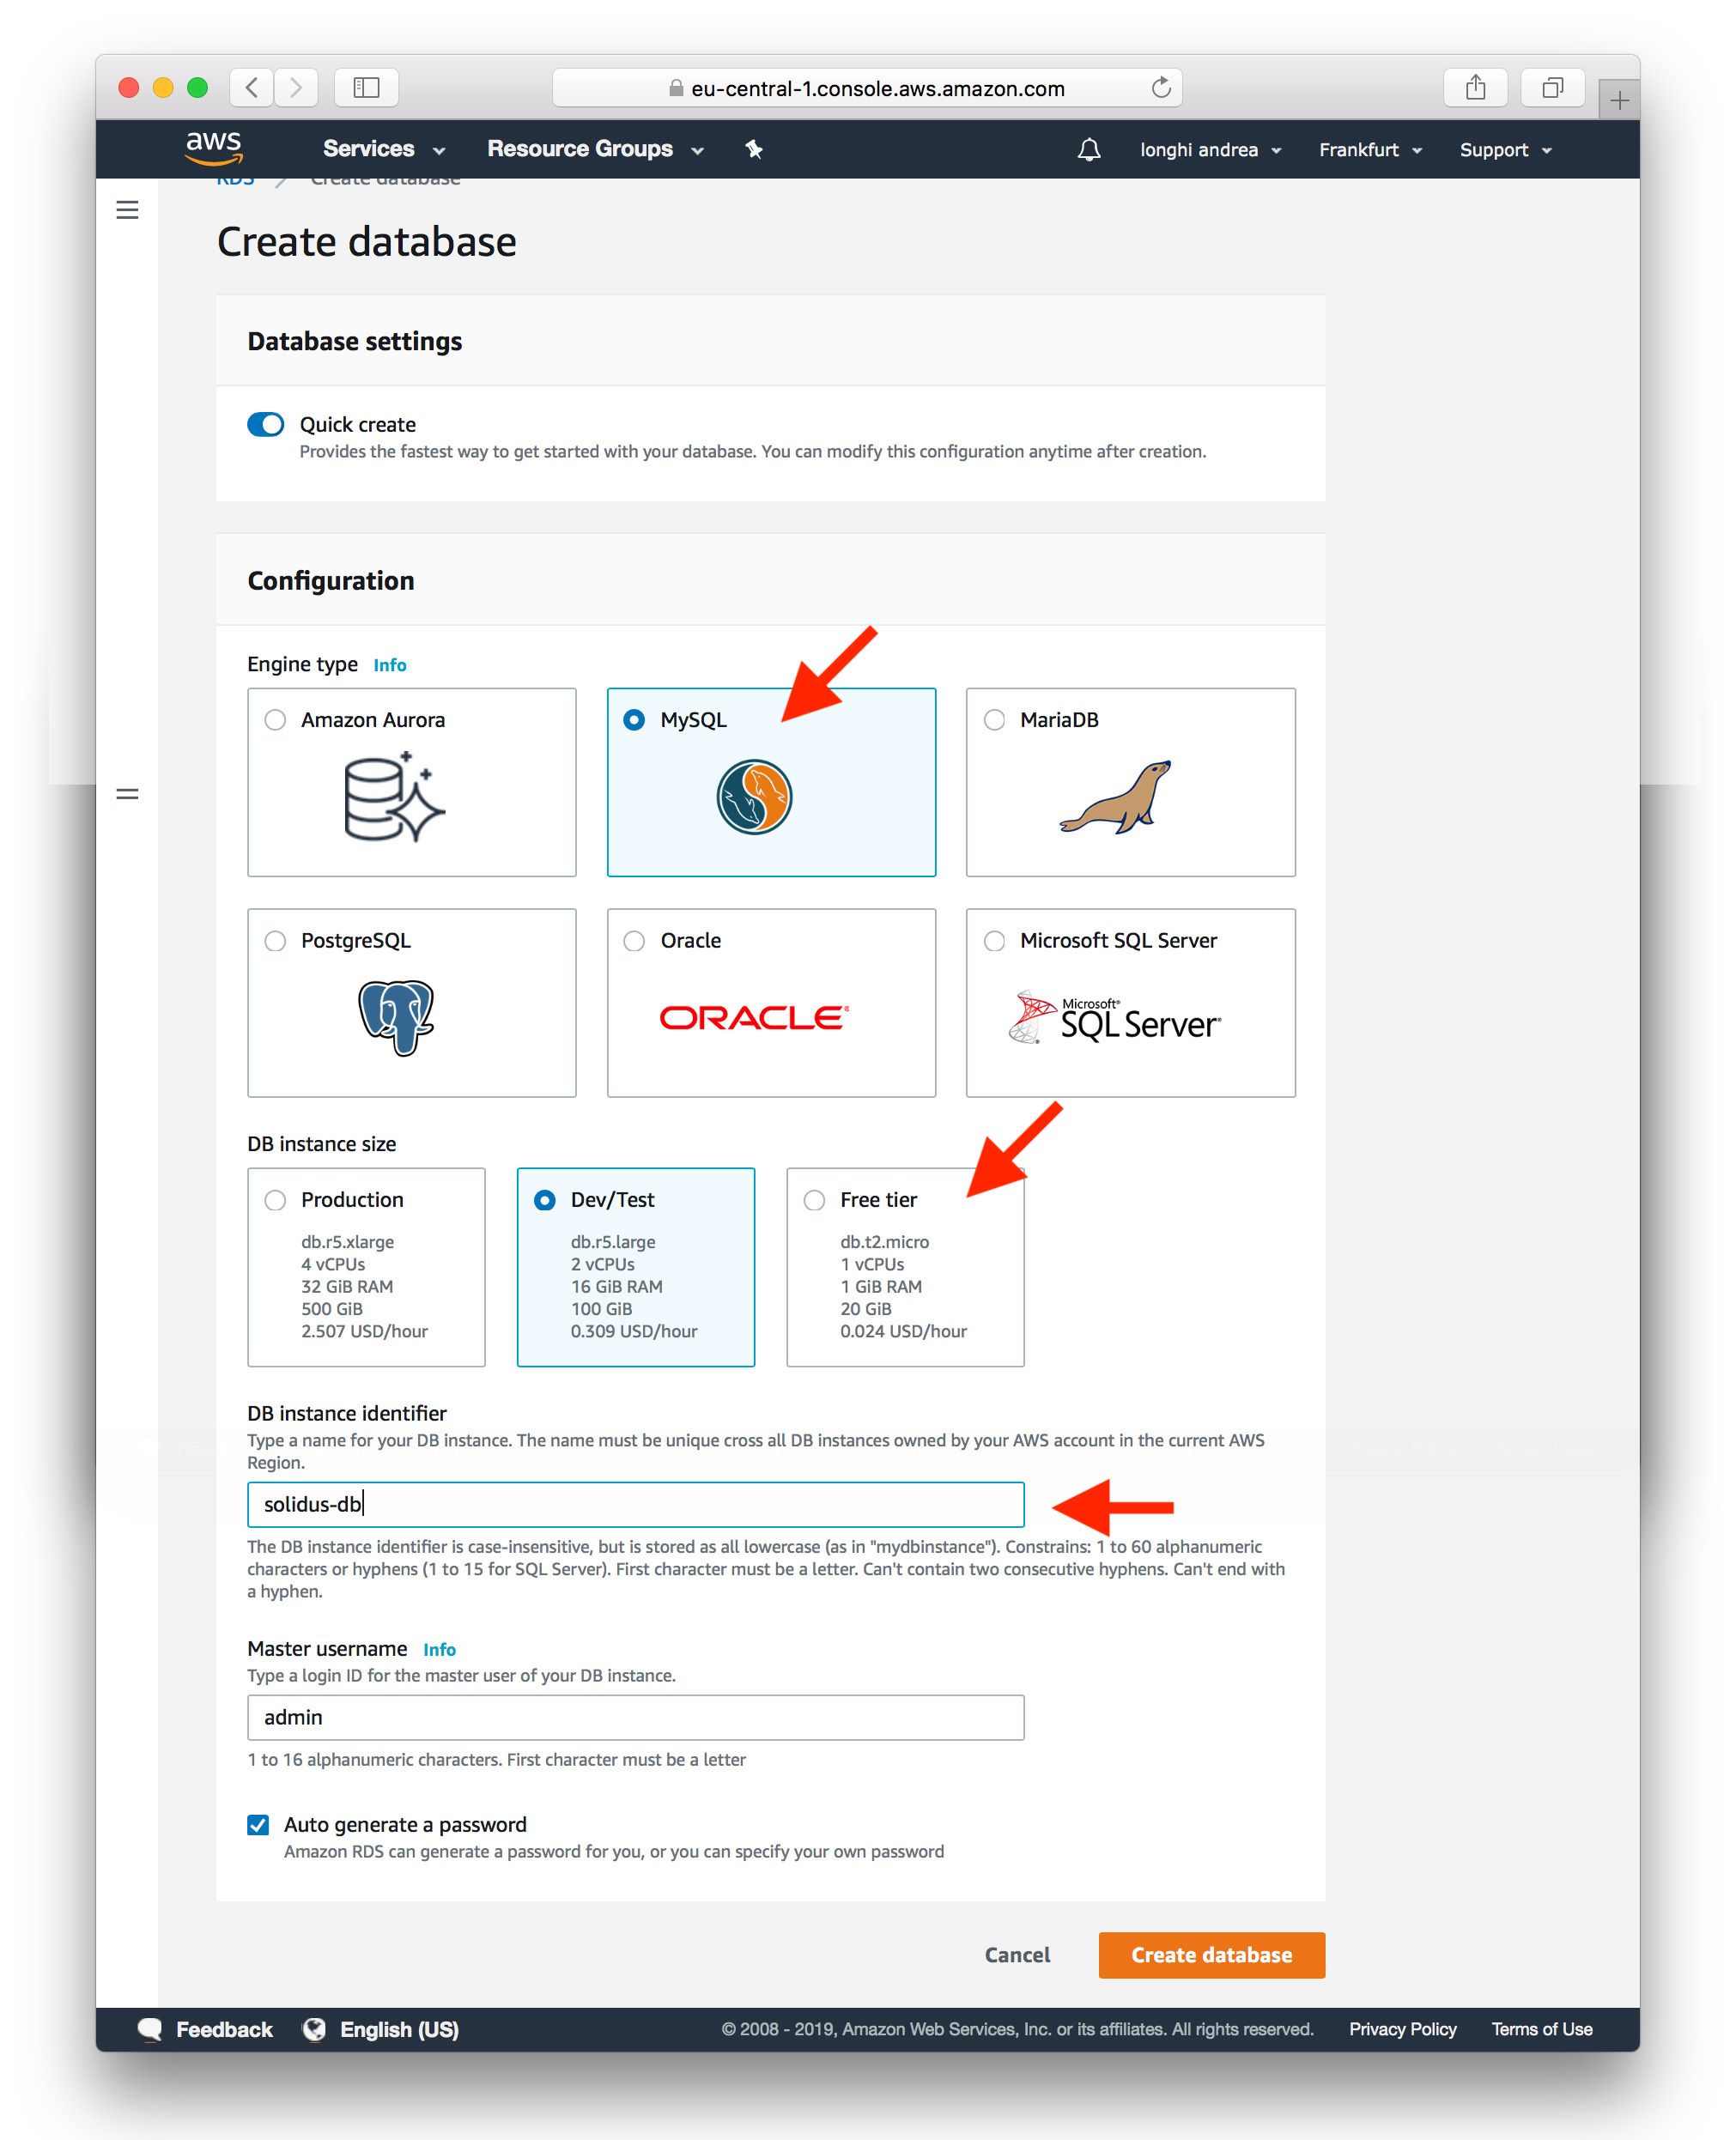
Let's add the database layer. Visit Amazon RDS page and click on Create Database. Choose your
RDBMS system (I picked MySQL). Choose the Free tier option (again, playing around with AWS can
become quickly expensive) and choose a DB instance identifier name:
Add database layer
Go back to Opsworks and add a database layer. You will see the newly created DB listed on the page.
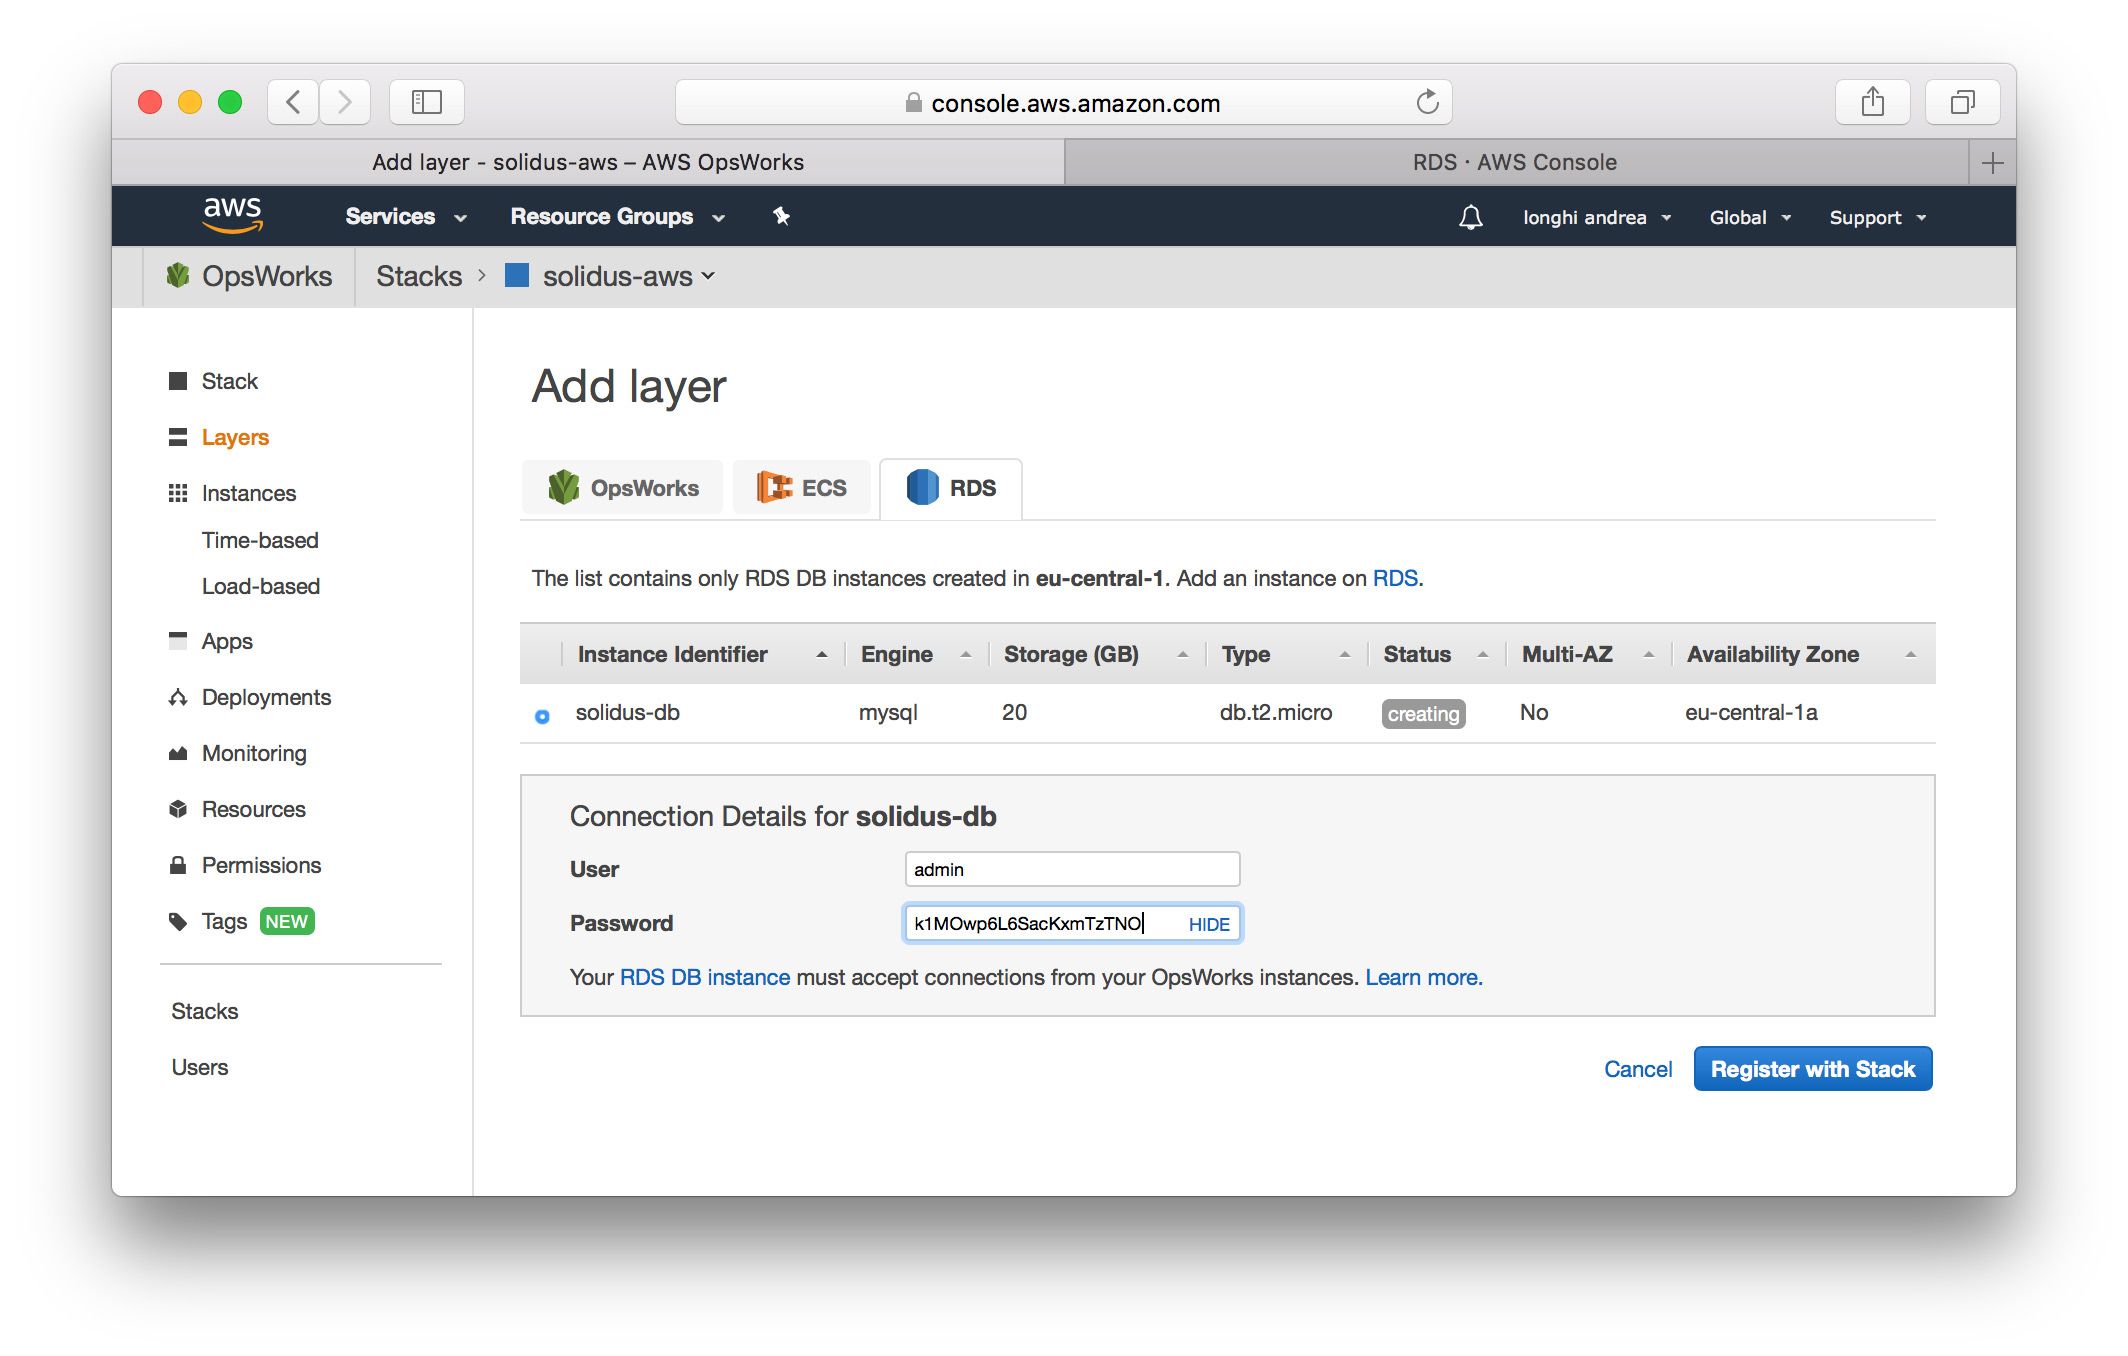
After that, we still need to link the RDS database to the app:
Turning on the instance
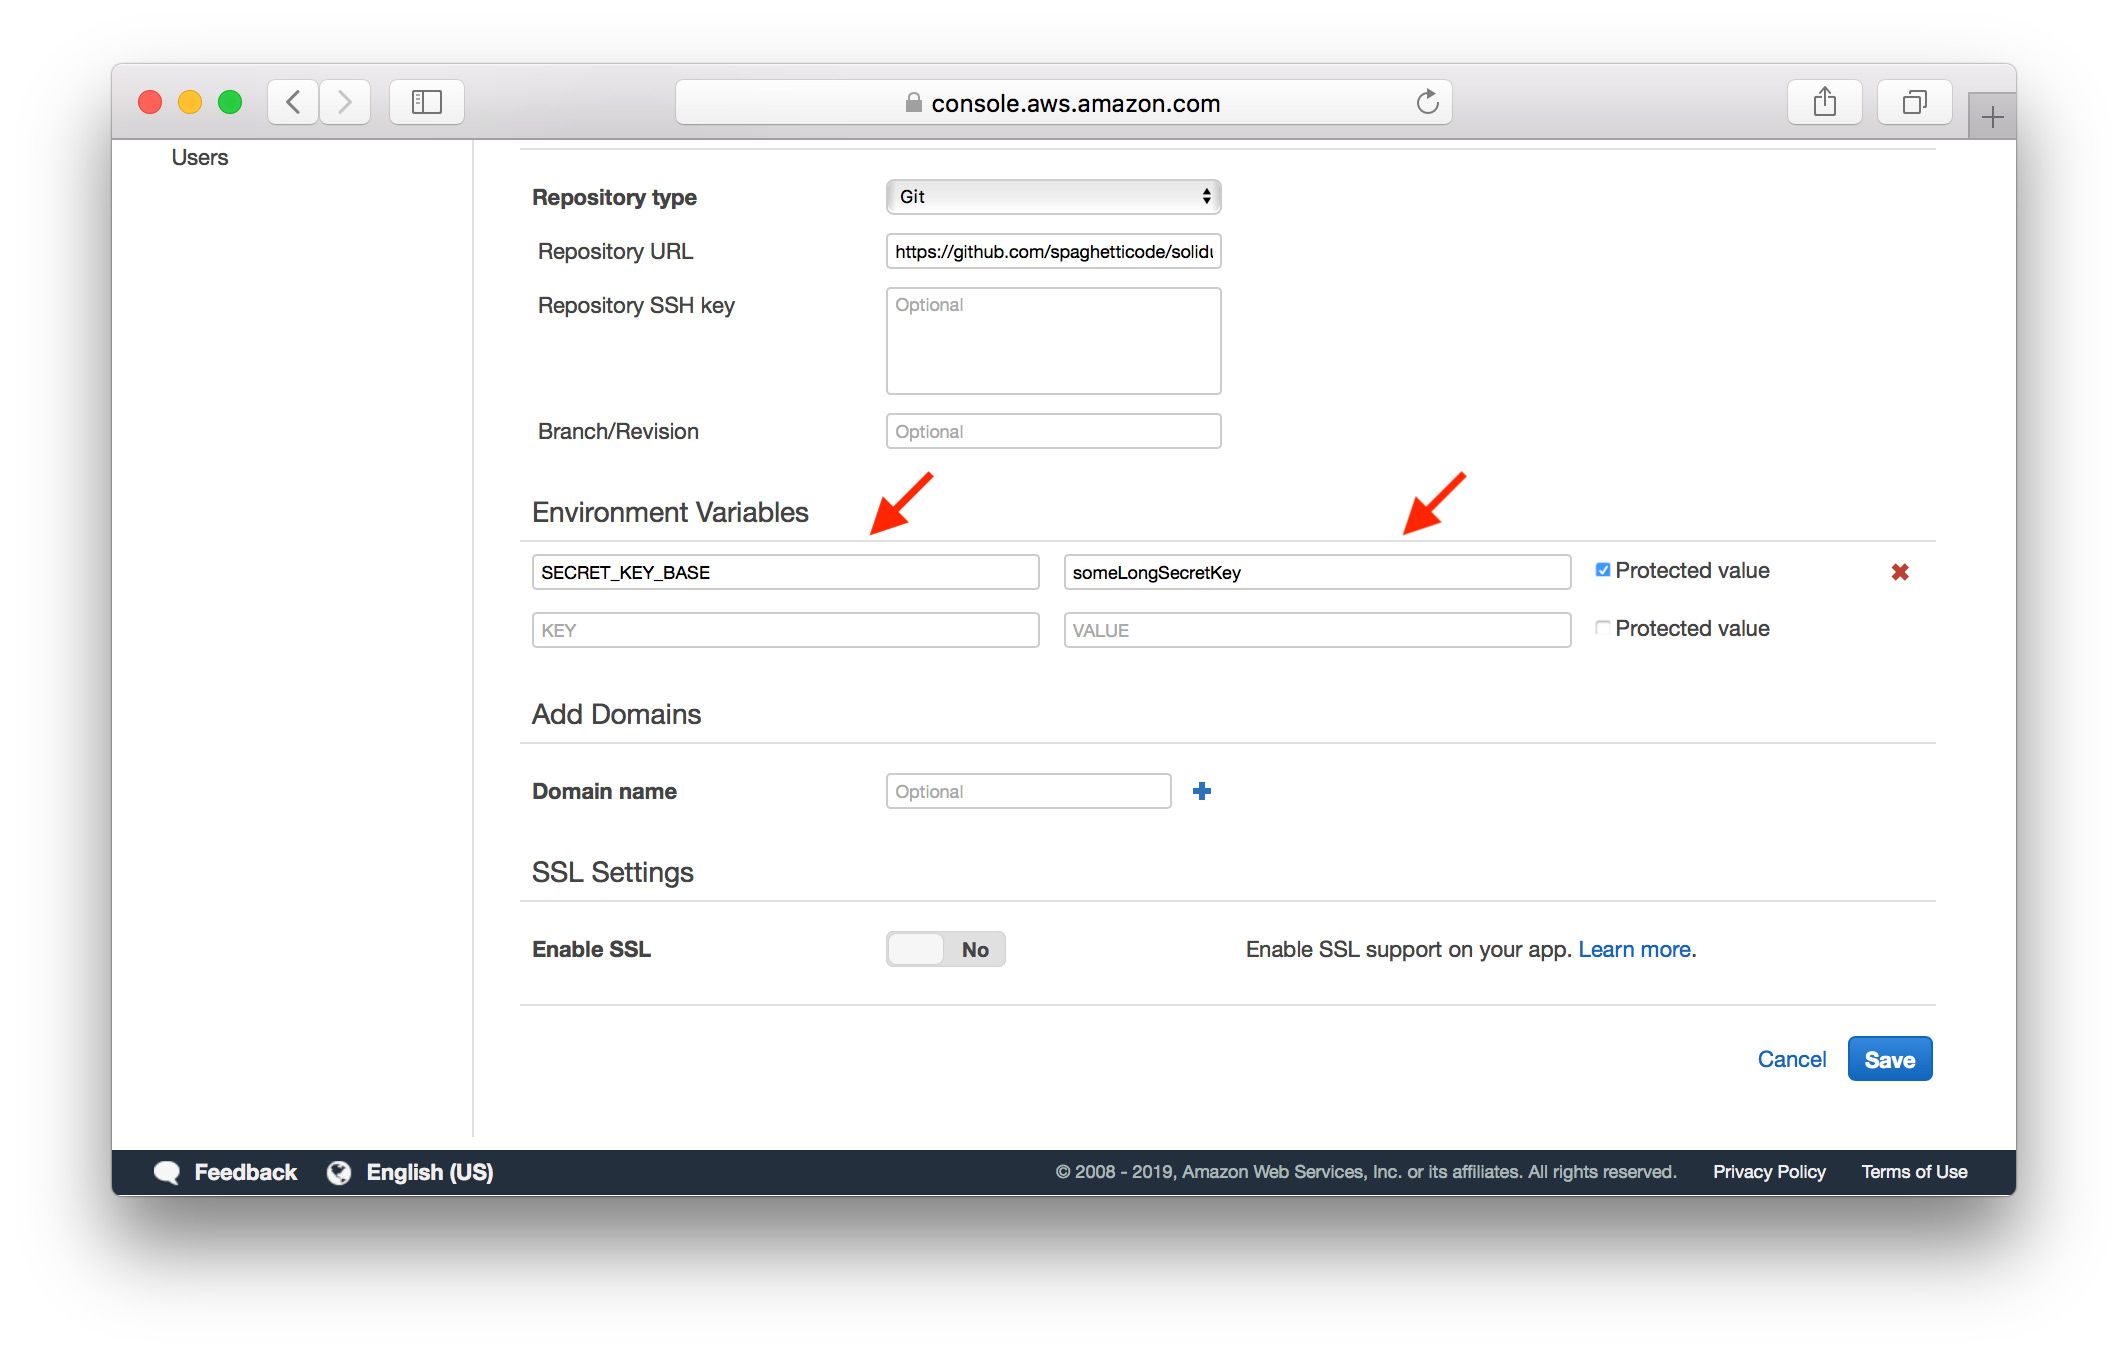
Let's try to turn on the instance again... and again it will fail. This time the error is:
ArgumentError: Missing `secret_key_base` for 'production' environment, set this string with `rails credentials:edit`
Easy fix: visit the app edit page again, and add an ENV variable for the secret_key_base, like this:
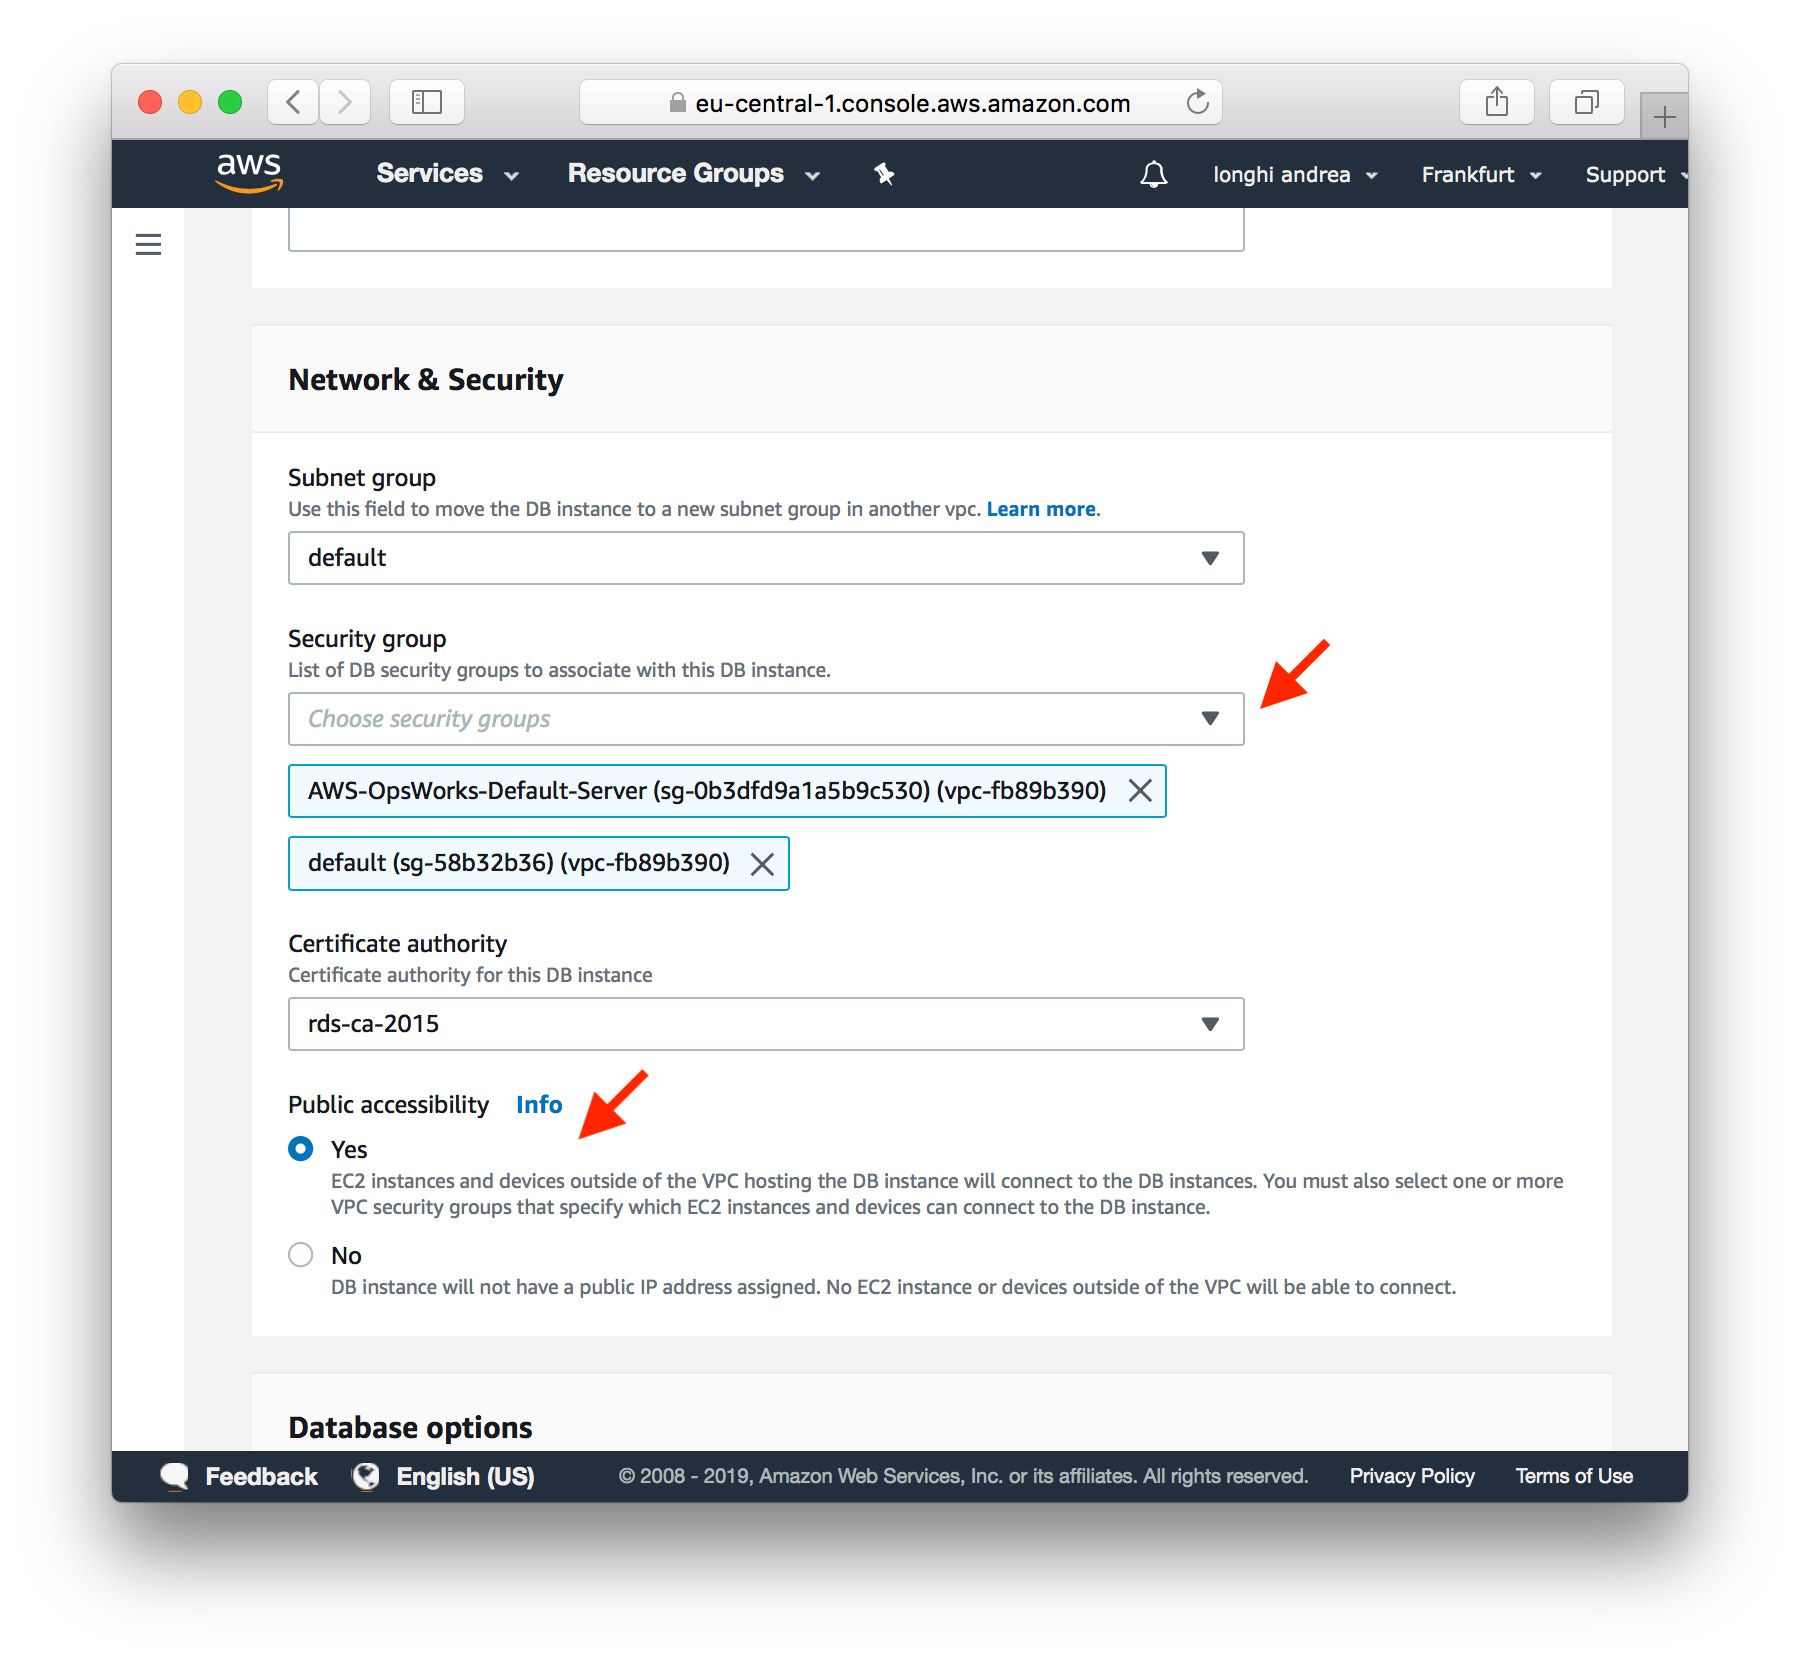
After this, turning the instance on will result in another error. The connection cannot be estabilished. This is due to the different security groups of the Rails layer and RDS database instance.
Again, an easy fix. Visit the database edit page and update it. While there, make the database publicly accessible so you will be able to load a database dump:
If you try to turn the instance on, you will get the last error (hopefully!) we're going to see today:
Create the admin user (press enter for defaults).
Email [[email protected]]:
STDERR: rake aborted!
NoMethodError: undefined method `strip' for nil:NilClass
This is due to the fact that the boot process tries to run Solidus setup, but as there's no shell for user
input the process fails. This can be easily fixed by setting ENV variables for ADMIN_EMAIL and ADMIN_PASSWORD,
but we're going to circumvent this issue, as this gives us the chance to see how to import DB data to RDS.
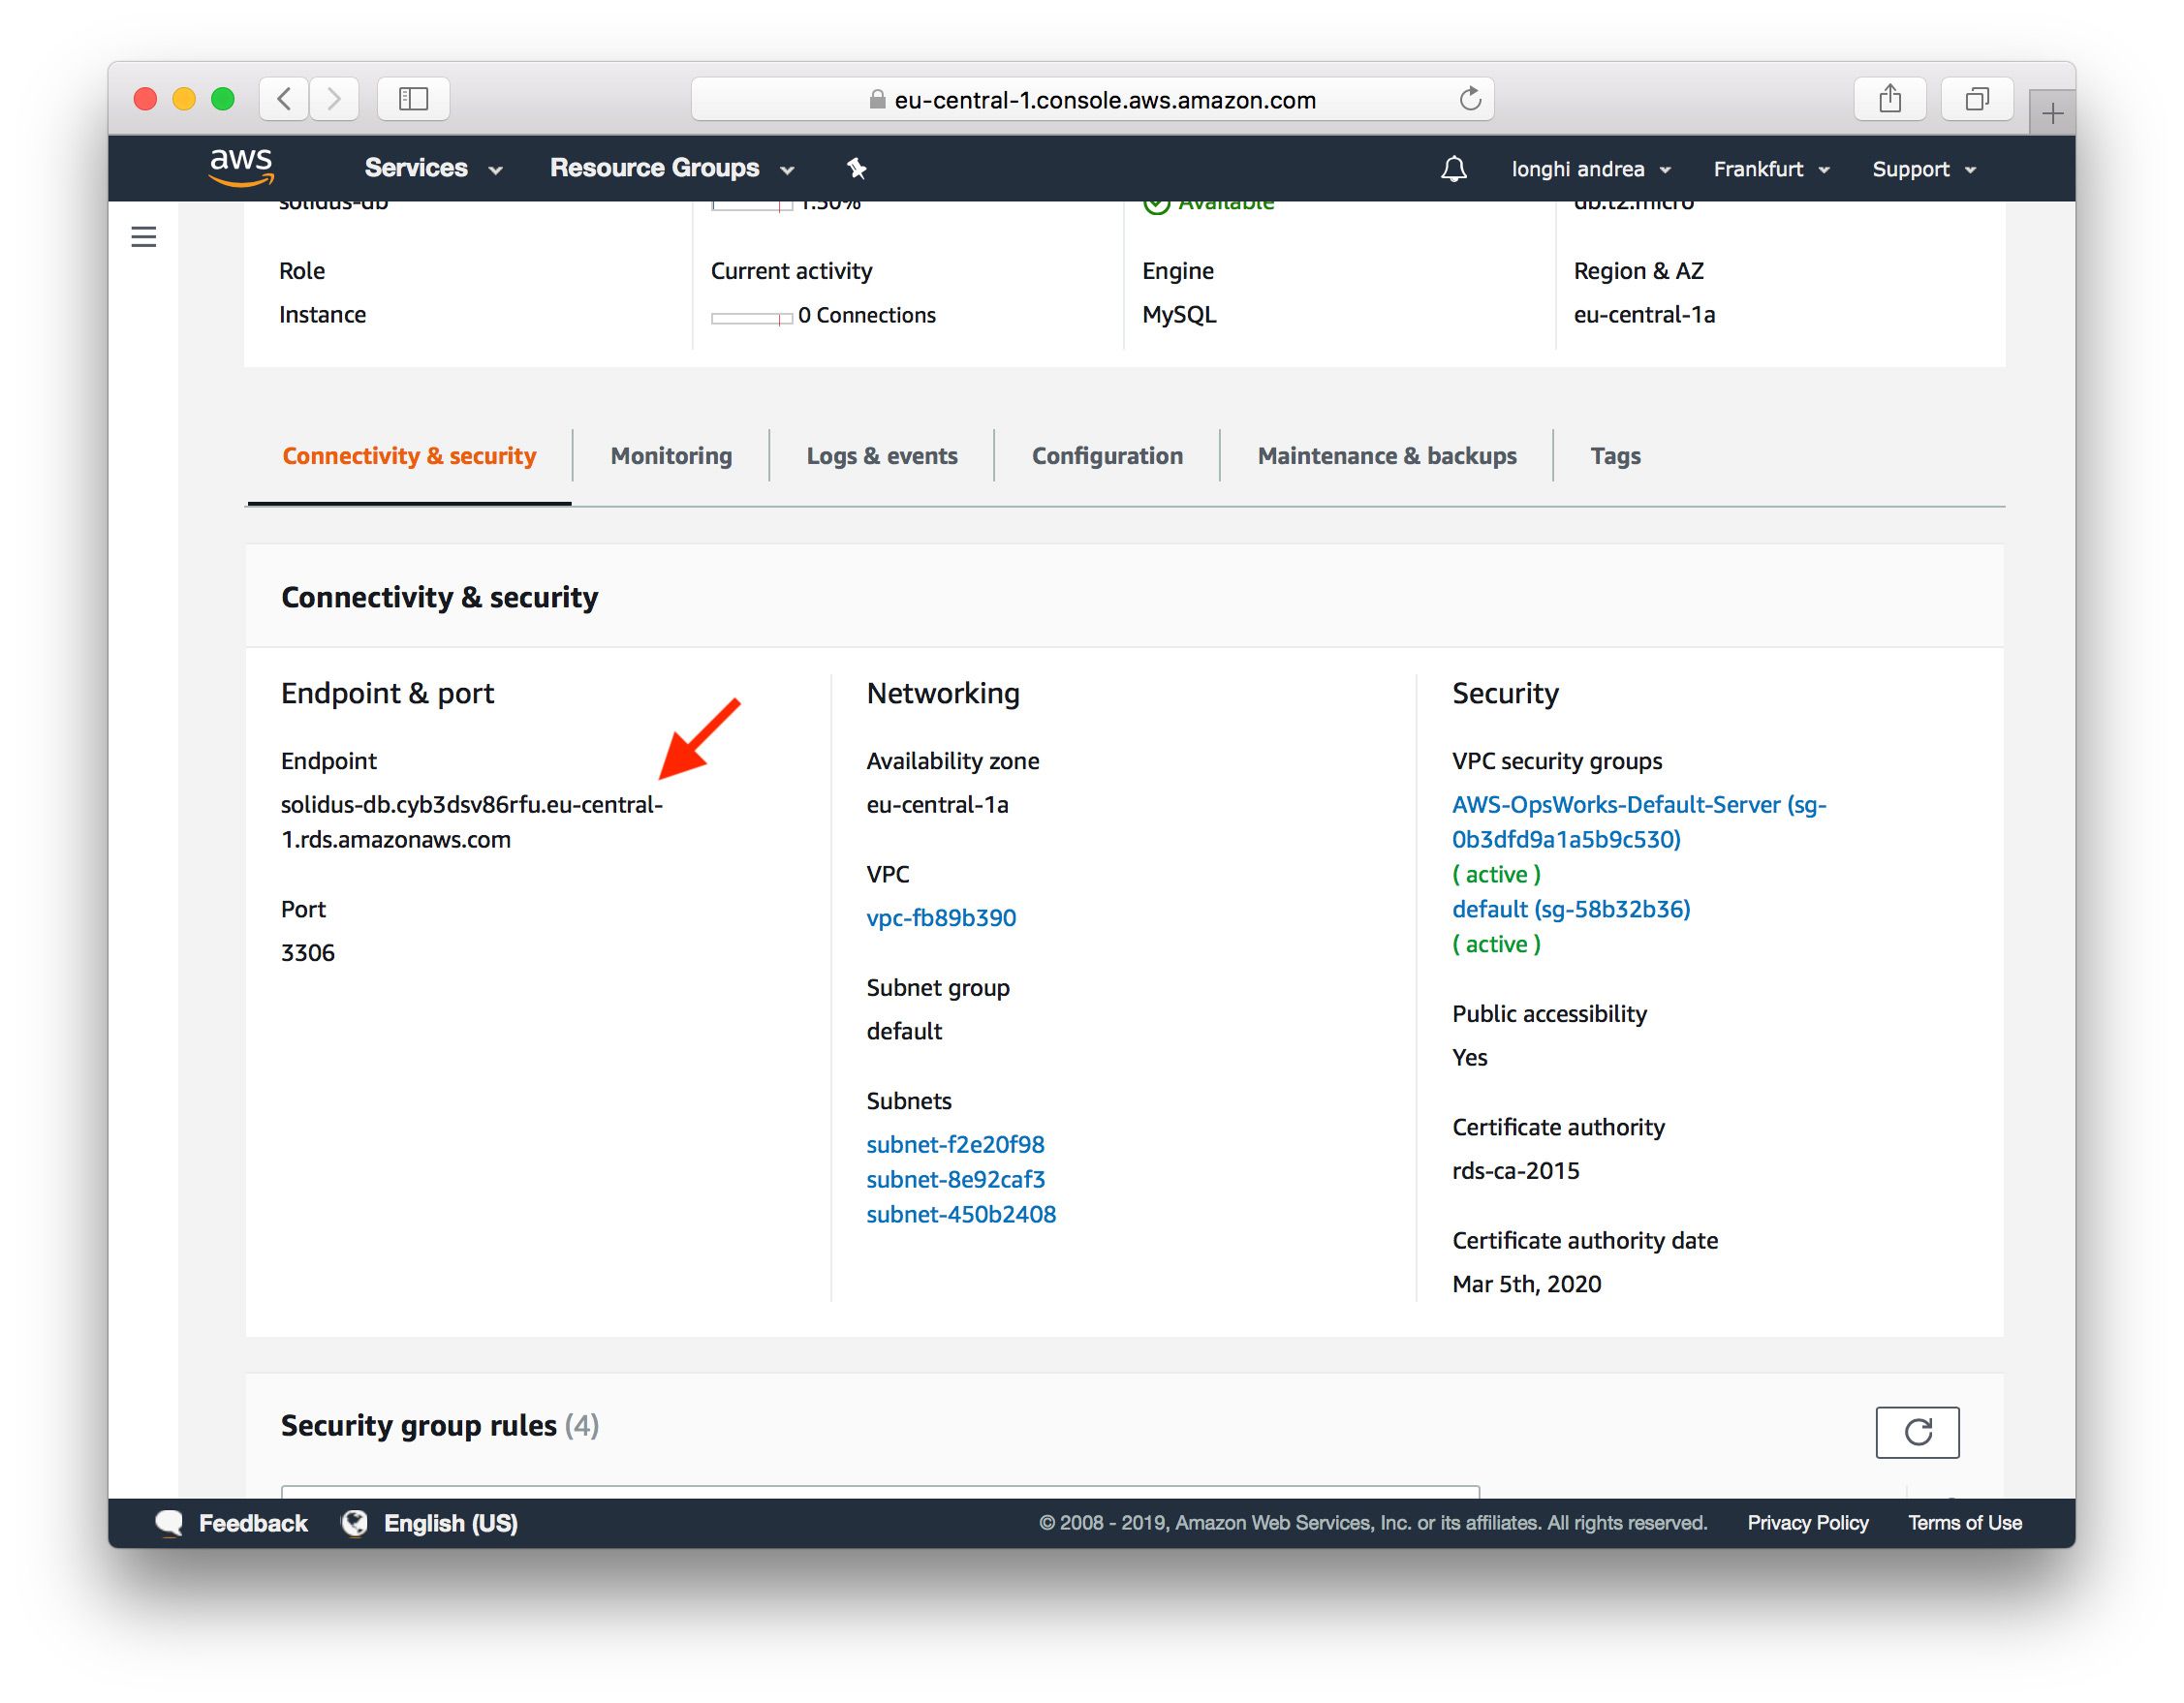
Check on your RDS database page the public URL for accessing it:
If you've never done this before, you need to add your SSH key to AWS in order to connect to the servers using the terminal. Please follow the official Amazon guide for completing this step.
Dump your local DB data with mysqldump on your HD, so we can load it on RDS via SSH. First check you can access the database:
$ mysql -u admin -pSECRETPASSWORD -h solidus-db.cyb3dsv86rfu.eu-central-1.rds.amazonaws.com
mysql> show databases;
+--------------------+
| Database           |
+--------------------+
| information_schema |
| innodb             |
| mysql              |
| performance_schema |
| solidus-db         |
| sys                |
+--------------------+
6 rows in set (0,03 sec)
Now, load the dump:
$ mysql -u admin -pSECRETPASSWORD -h solidus-db.cyb3dsv86rfu.eu-central-1.rds.amazonaws.com solidus-db < development.sql
After it's done, it's time to start the instance for the last time:
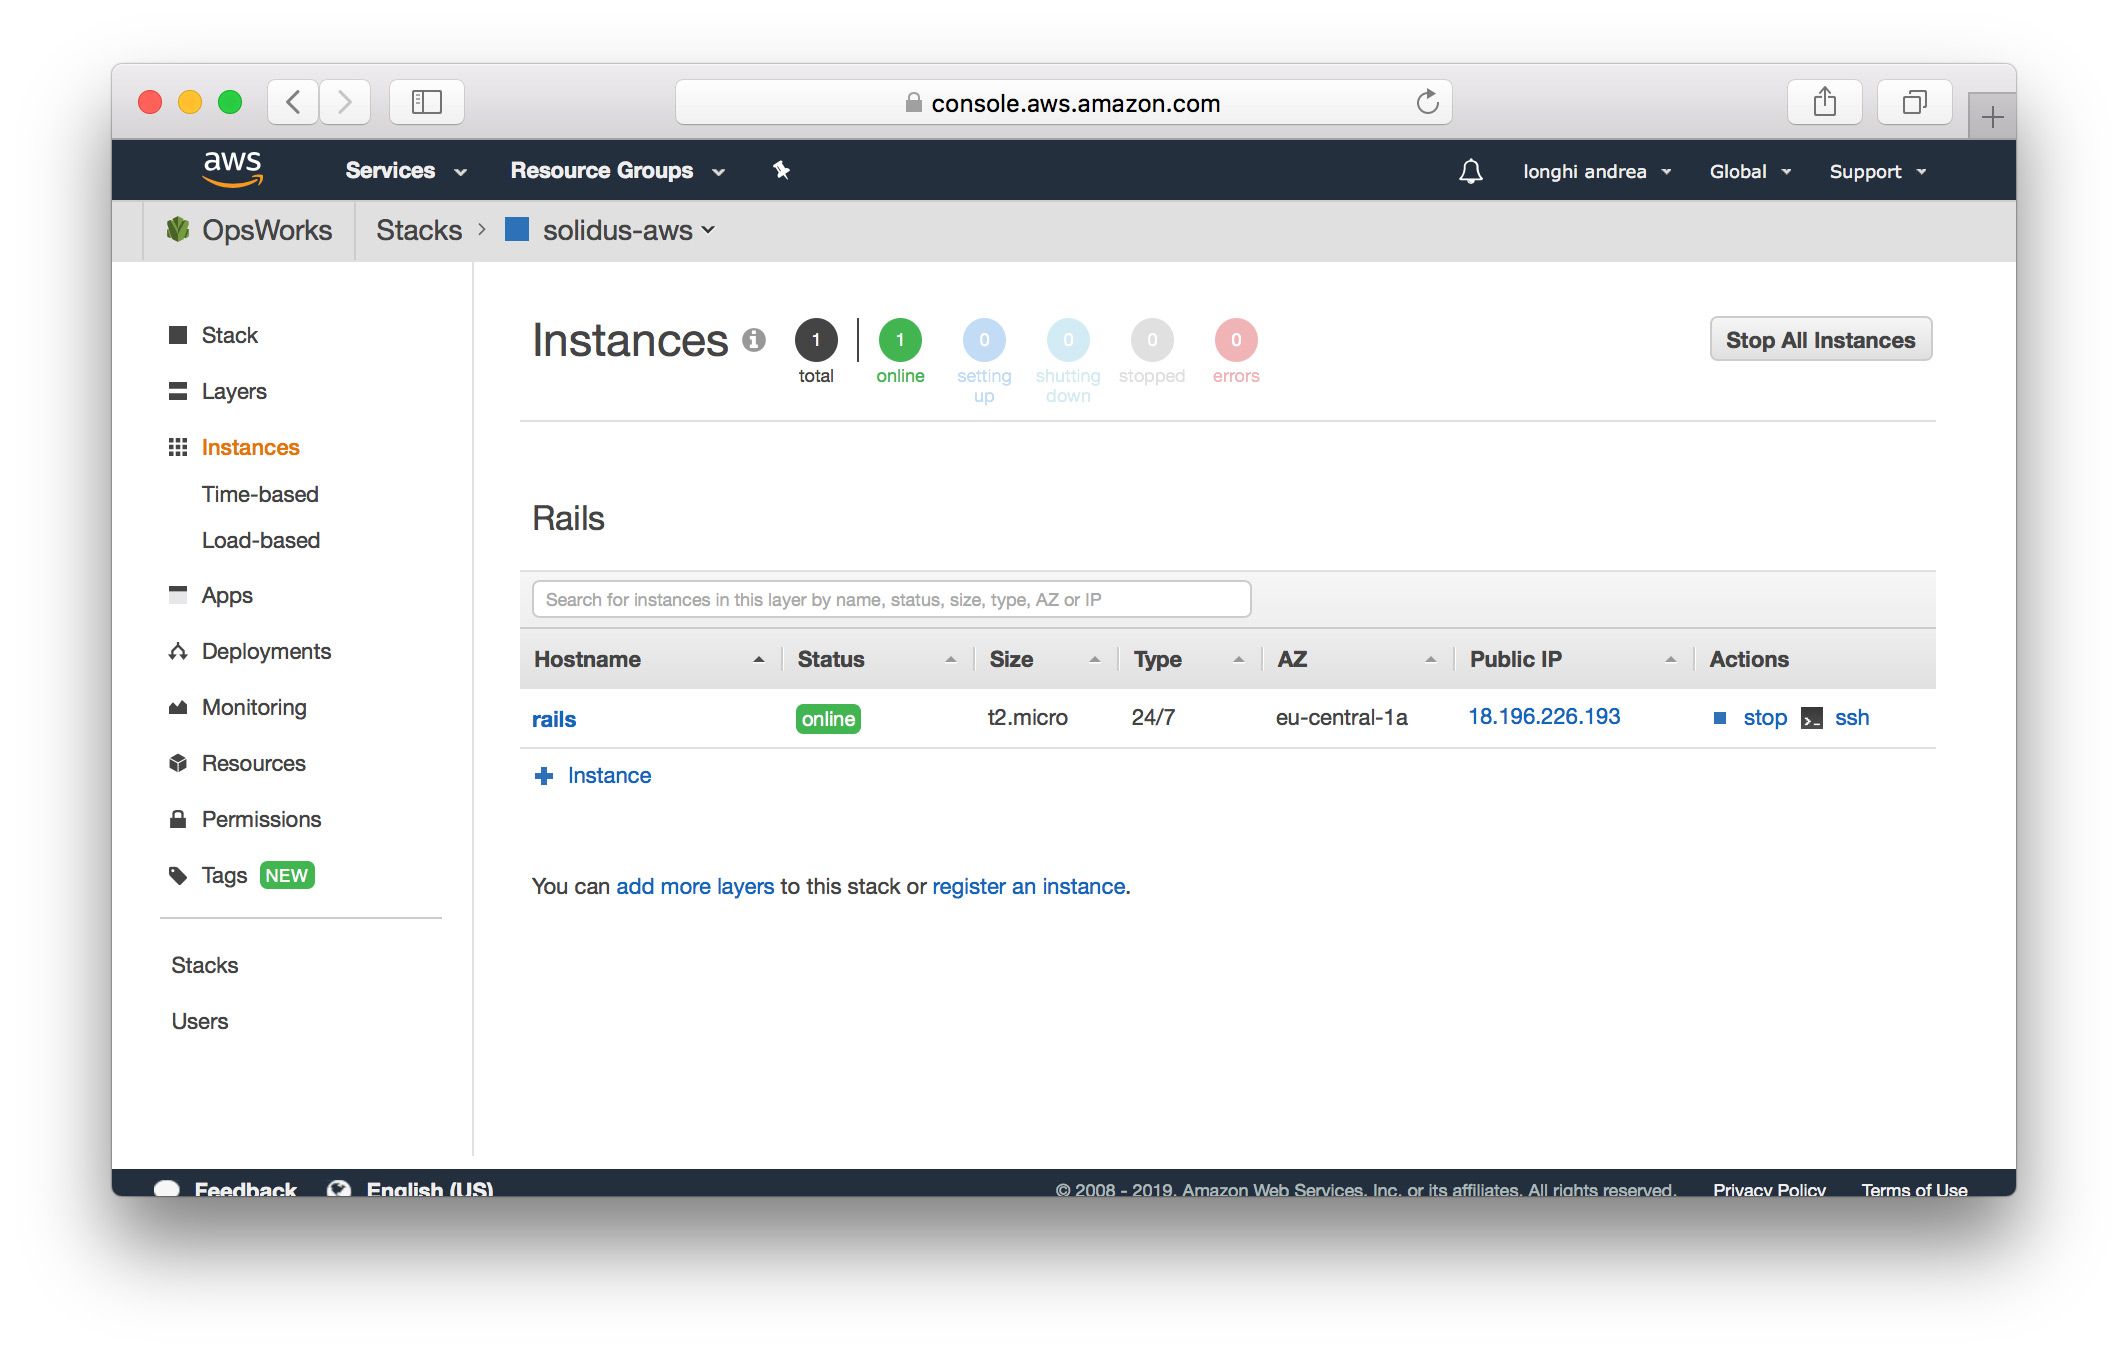
When you click on the IP address you will be redirected to your Solidus website:
And that's all folks! I know this is just a very basic Solidus installation, images are still hosted on the filesystem and you probably want to host them on S3 or similar services, but hope you enjoyed this post and the step by step process will guide other devs that are not (yet) comfortable with AWS in making their first Solidus/Rails application deployment.