
As a designer, you might be scared to handle data, dredge through (horrible) data charts, or decipher complicated formulas on an XLS file. But, if you want to achieve the goals you defined before starting a new project and measure your success, these tools are a necessity!
First, you have to define Key Performance Indicators (or KPIs). For example, what is your desired outcome? How are you going to measure progress? A KPI is a measure you would use strategically to track the performance of your project.
As an example, our primary goal on the Nebulab website is to increase lead generation. So we placed a major call to action (CTA), “Get in touch!” always visible and easy to find: one in the header, one in the hero, and one in the footer. To figure out which one performs better (and on which page), we’ve been tracking each CTA with Google Tag Manager and collecting data from Google Analytics.
The results from tracking this goal found that the CTA which performs better is the one in the header, even though we’ve repeated the same CTA with a bright background color (yellow) on the left side of the hero. In this instance, the bright color doesn’t matter, but the position of an element is more relevant.
 A detail of the heatmap on our website: it’s clear that the CTA in the header wins over the one in the hero.
Many tools such as HotJar can provide information on which CTA is performing better than another. However, utilizing Google Tag Manager (GTM) with Google Analitycs (GA) lets you measure the number of clicks on every single CTAs per page, and it also helps you understand if the design provides the best user experience. Plus, it gives you an idea about WHAT to improve and HOW. For example:
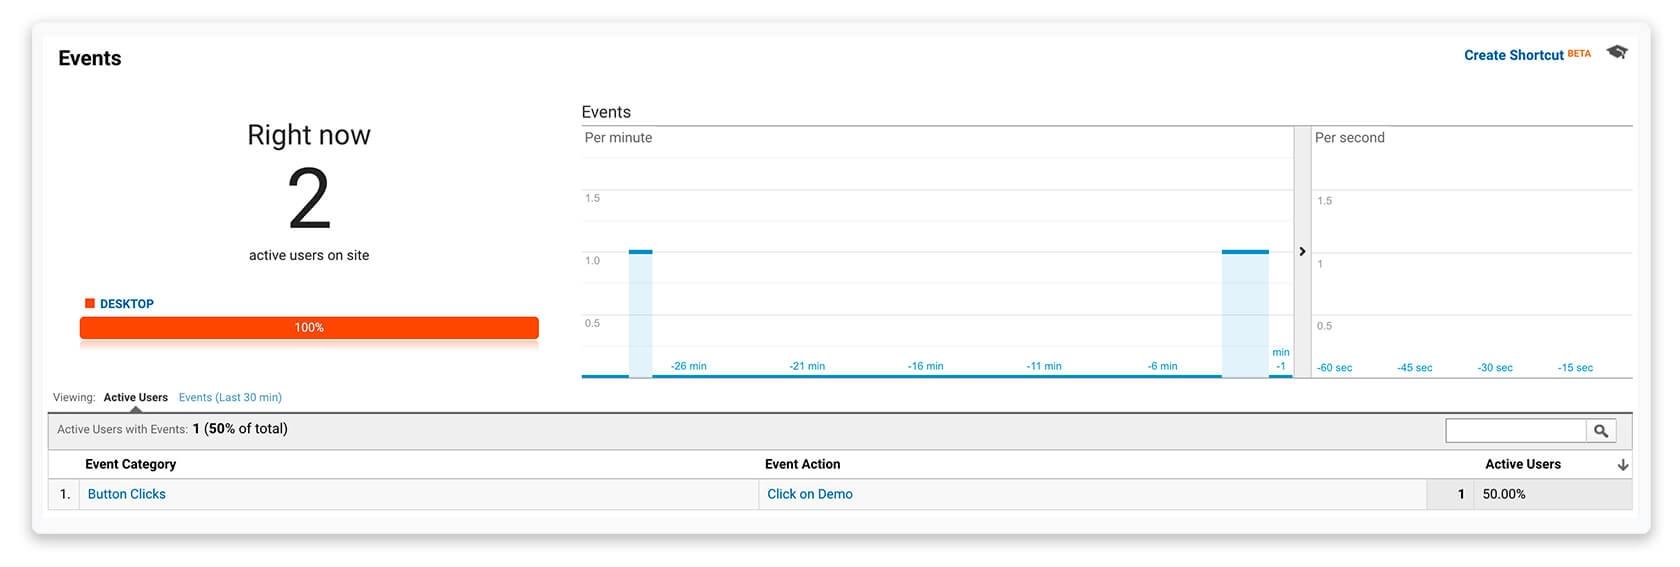
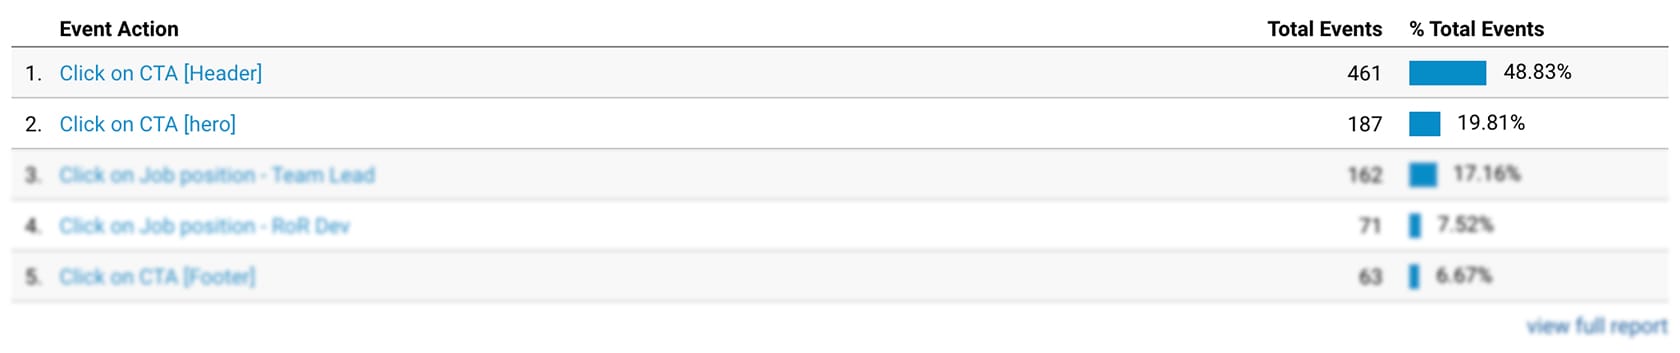 The Events Overview on Google Analytics: see the difference between the two main CTAs (Header and Hero)
The Total Events are the number of clicks done. You can notice the difference between the CTA - Header and the CTA - Hero. To determine the effectiveness of the design, we will measure KPIs at the end of the month so we can do an A/B test with the hero’s CTA and see what happens if changing the color, for example, increase the leads number. We can continue to repeat the process and modify parameters until we maximize our monthly clicks.
This is a basic ready-to-use guide to enable event tracking on a simple CTA. Sign in to Google Tag Manager and follow the steps below. Let’s start!
Create a new TAG
-
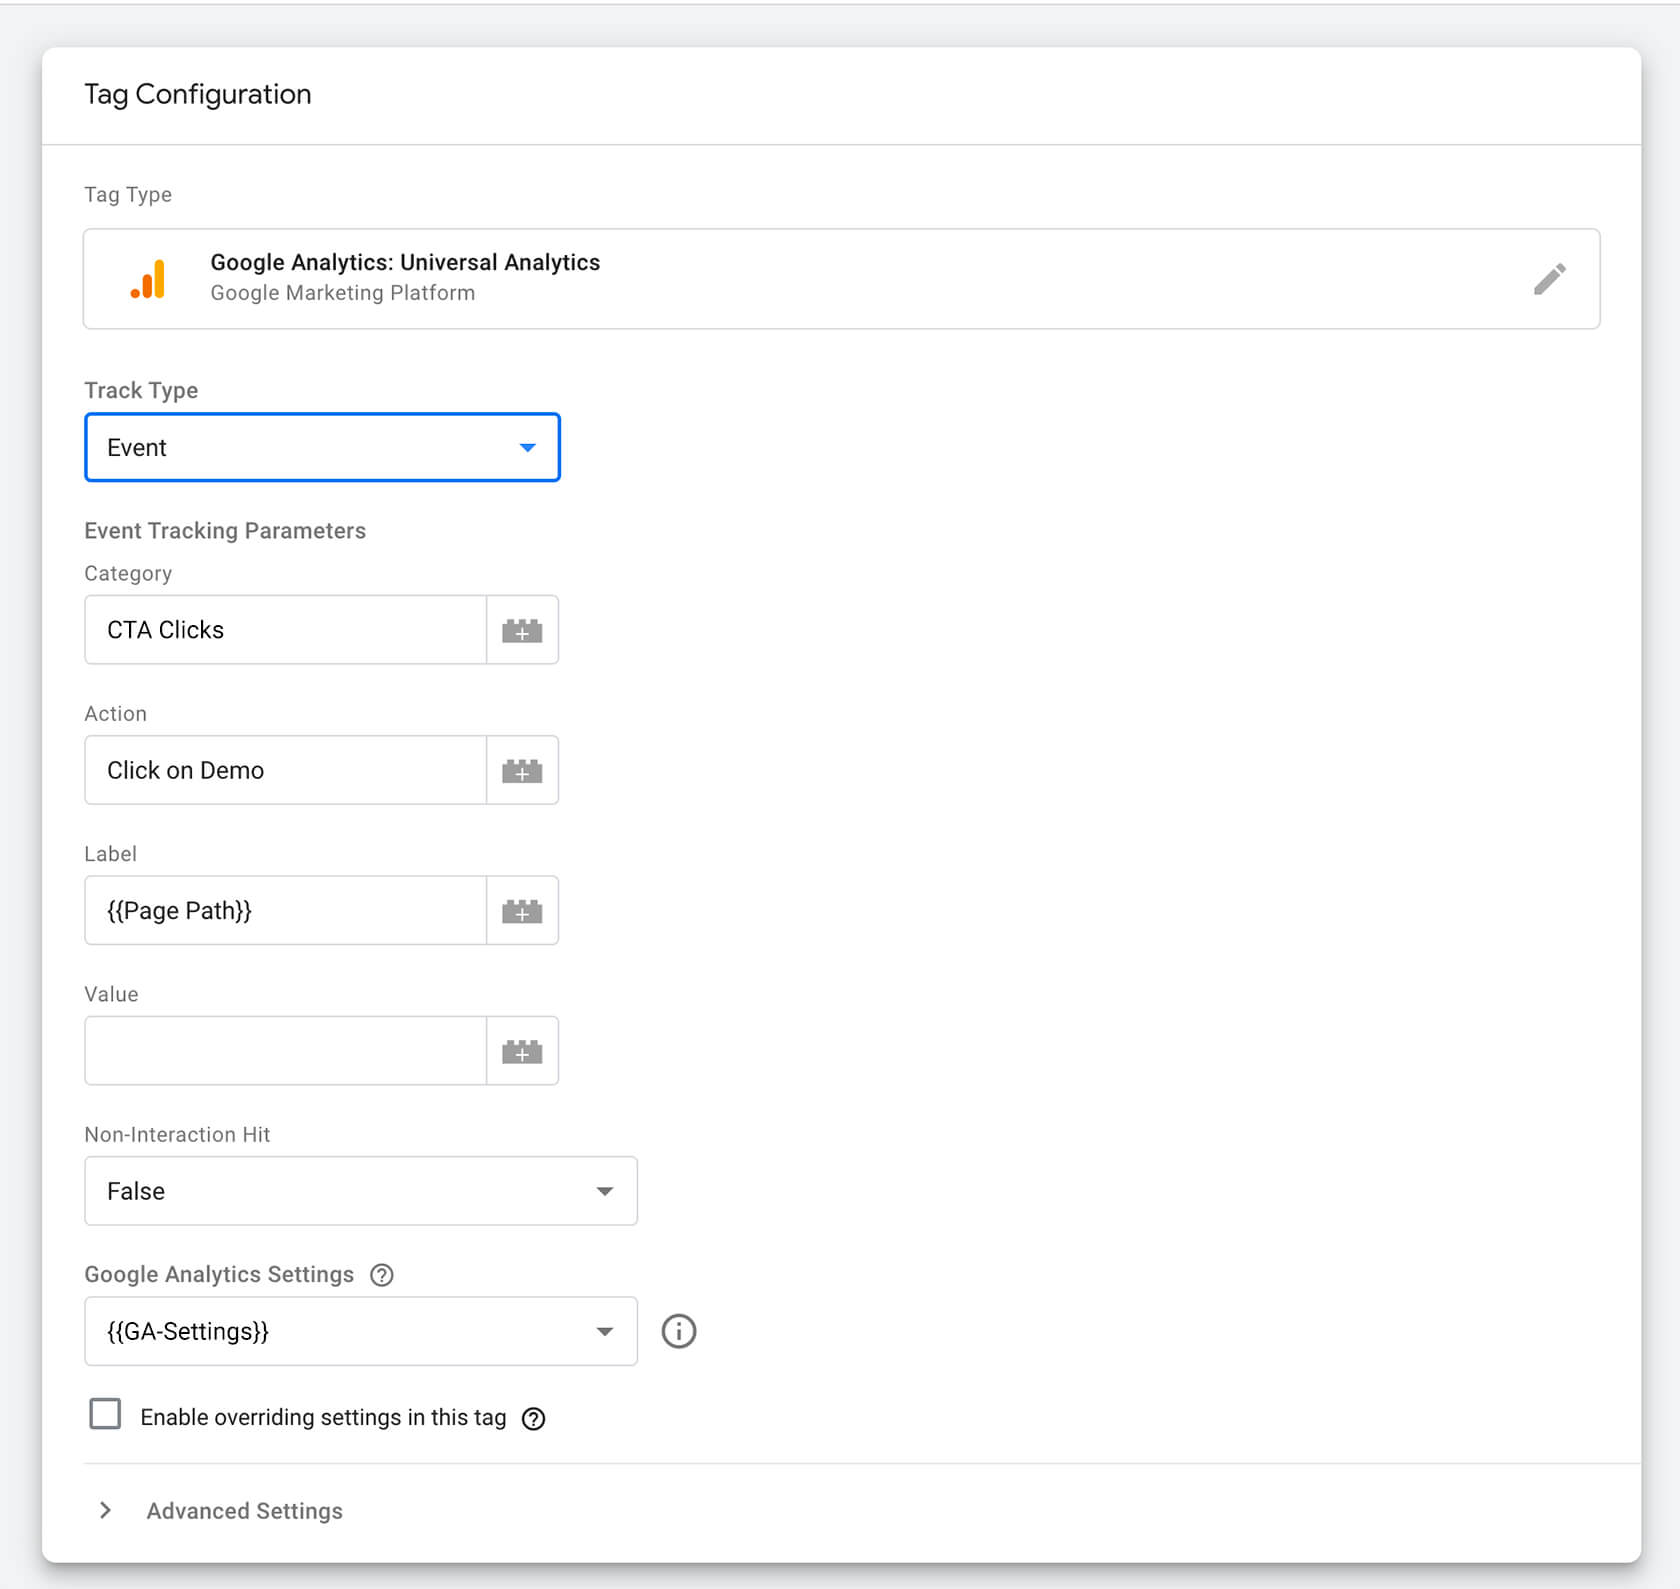
Tag type: GA: Universal Analytics
-
Track type: Event
-
Category: the name you choose to create here will be shown on GA on the Events section as Main Event. This is the macro category that helps you to identify the event type, so calling it CTA Clicks, for example, it’s fine. Action: you’ll find this name on GA as well. This refers to the action related to the CTA, try to be specif here, for example: Click on demo, or Click on contact us, and so on.
-
Label: the Label will help you later identify, on GA, the total number of clicks on a specific button. It could be custom or built-in: the Click Text one is useful if you don’t want to specify it in the Trigger - also because the CTA’s text could change in the future. I usually use the Page Path label to have a better overview (on GA) of which pages have the higher number of clicks.
-
Non-Interaction Hit: leave it the default value (False). This because the tag will be interpreted as a user interaction by GA (and therefore will prevent a single-page session from being recorded as a bounce).
-
Google Analytics settings: select the custom variable that includes your Google Analytics tracking ID (if you haven’t already created it you can jump at the end of this article and follow the steps described.
Create a new TRIGGER

Now you need a trigger that fires the event when some specific conditions occur.
-
Name: find a name that explains the action (Click) of the CTA you want to track (Demo CTA). For example: Click on Demo CTA.
-
Trigger type: select Click - All elements
-
Fires on: select Some Clicks
-
Set up conditions: you can activate it when the variable Click-classes contains the class “button” or other specific classes. If you think the Click-text is very specific and it doesn’t change (if the action remains the same, for example: ”View the demo”) you can use the condition: Click-text contains demo. You can be more specific by adding further conditions.
Test it
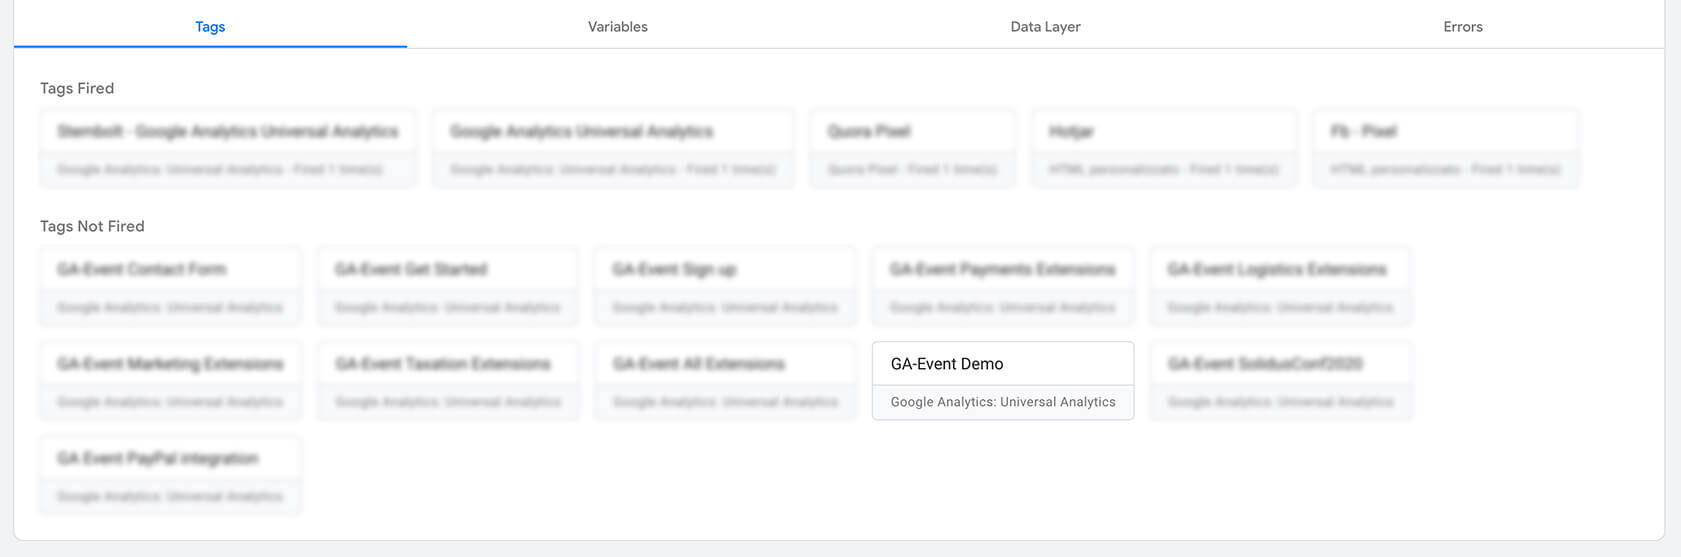
Done! Now you can test if everything is working on the Google Tag Manager preview. When your work area is published you can do a double-check with Google Analytics: open the Realtime section on GA and click on a CTA (in another browser tab). If the event has been fired correctly you should see it under the Events subsection.
 Tag not yet fired on Google Tag Manager Preview
 Tag fired on Google Tag Manager Preview
 Tag fired on Google Analytics - realtime
Tips to track it on Google Analytics
Now that you have set up the events, let’s take a look at the results you’ll get on GA.
On the Behavior > Events page you can get an overview of all your Events Type (if you’ve followed this article here you should see the macro category CTA Clicks).
The most important category is the Events Action where you have all the CTAs you’re tracking. On the Events Label category you can view at the first glance which pages have the higher number of clicked CTAs (if you’ve set up the label as Page Path).
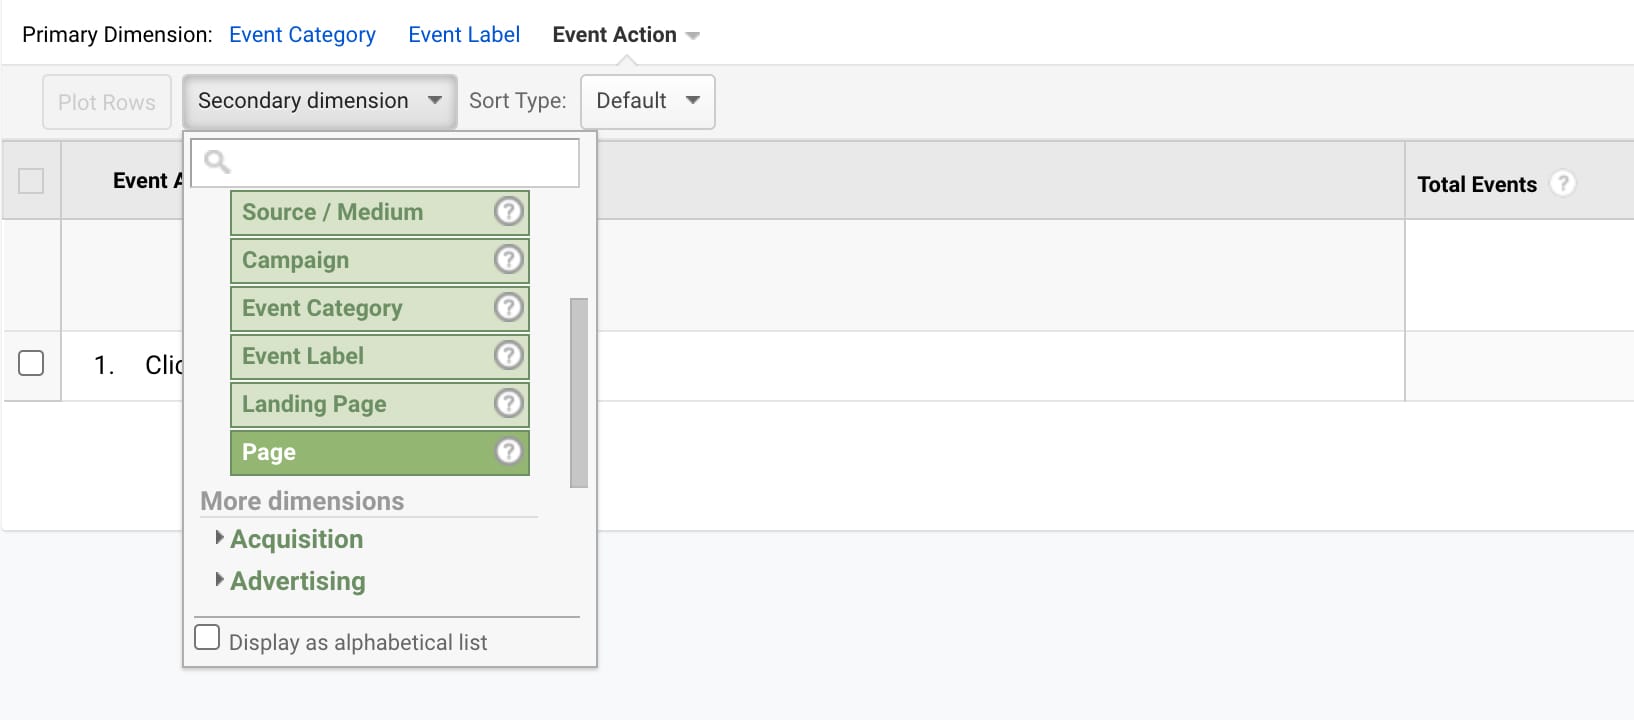
To view how many clicks a CTA got on which page, open the Events Action tab and select the Secondary Dimension in the search options. In the Commonly Used you can find filters like Events Label and Page (which is basically the same if you’ve set up the Events label as the Page Path).
How to include Google Analytics on GTM
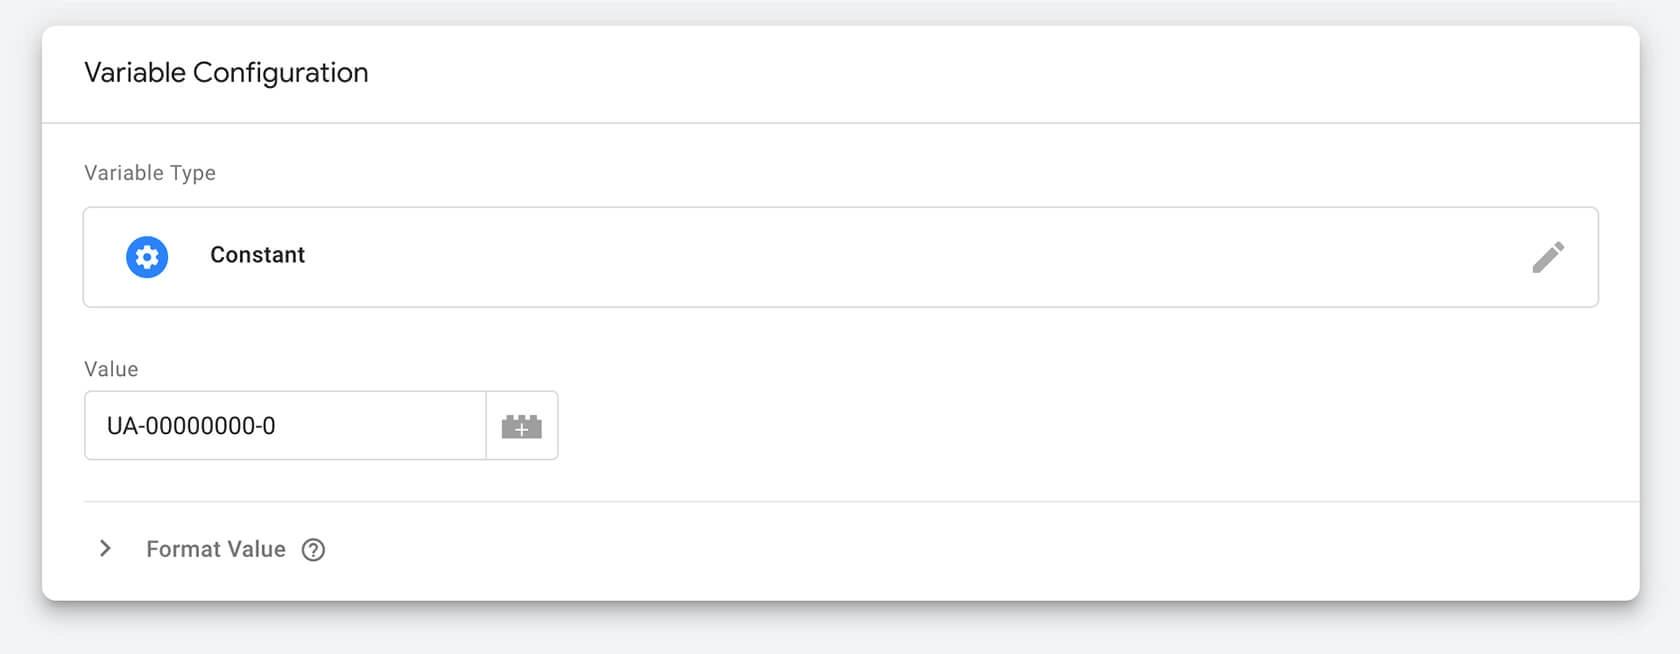
Create a new constant variable of your tracking ID
-
Create a new Variable, calling it GA-Tracking ID for example
-
Variable type: Constant
-
Add your Google Analytics Tracking ID (UA-XXXXXXX) as the value
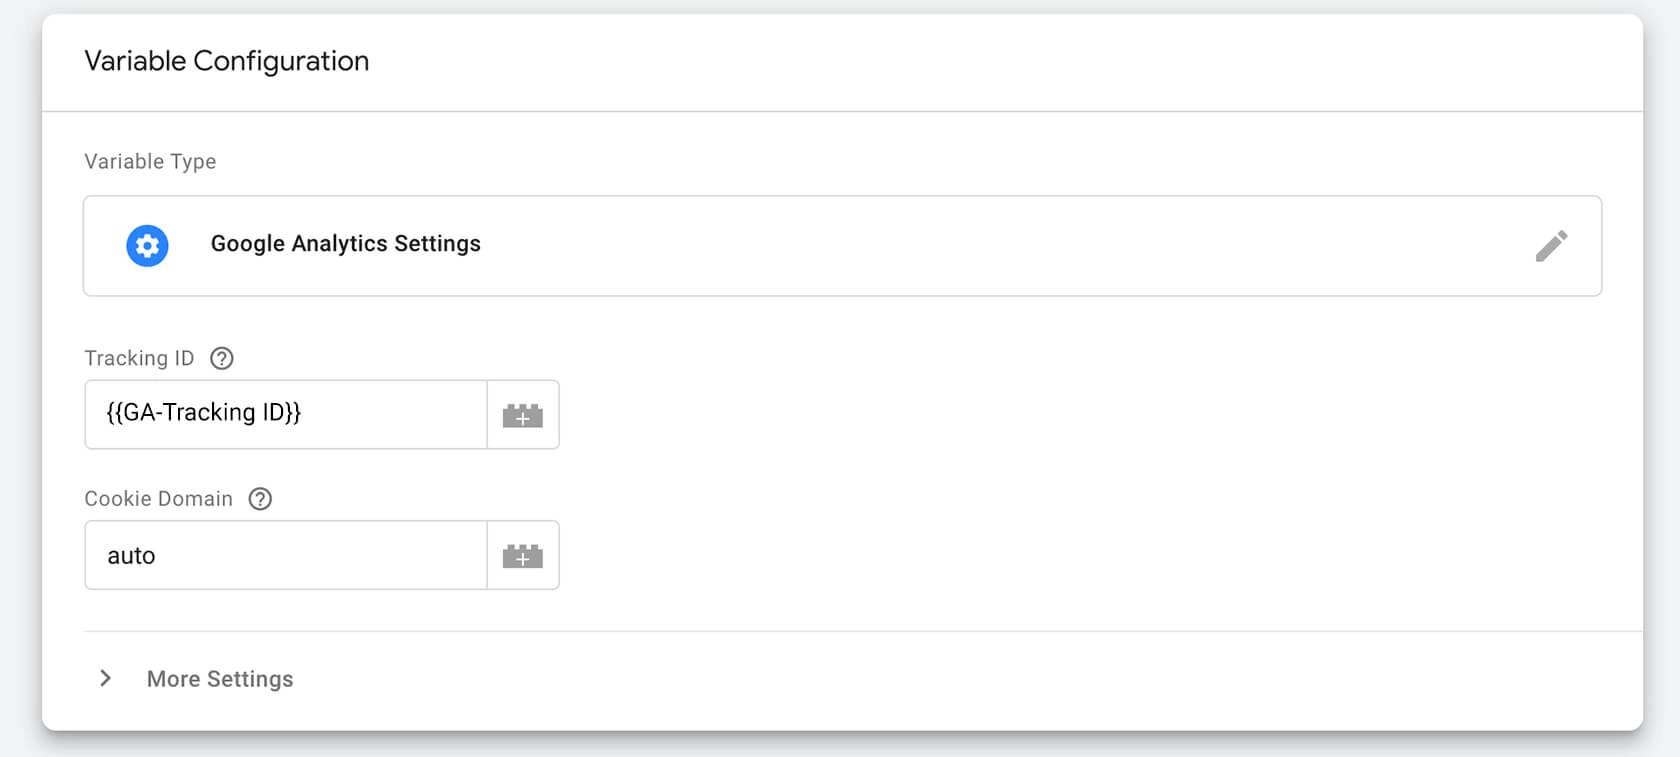
Create the custom variable of GA
-
Create a new Variable: you can call it GA-Settings
-
Variable type: Google Analytics Settings
-
Tracking ID: you can select the constant variable you’ve added before GA-Tracking ID
-
Cookie domain: leave the default Auto
The aim of this article is to give an overview of how you can set up and work with Google Tag Manager along with Google Analytics. These are powerful tools that every designer can use to collect some data and help them making functional designs that drive users through their journey on a website.